Installation Information
Thank you for visiting the Form Lighting installation page.
Watch the Installation Video:
- 2016+ Toyota Tacoma Sequential LED Headlights Installation
- 2018+ Ford Mustang Sequential LED Headlight Installation
- 2015+ Ford Mustang Sequential LED Tail Light Installation
- 2018+ Jeep JL Wrangler Sequential LED Tail Light Installation
- 2014+ Toyota Tundra Sequential LED Headlight Installation
- 2014+ GMC Sierra Sequential LED Headlight Installation
- 2007+ Chevrolet Silverado Sequential LED Headlight Installation
- 2007+ Toyota Tundra Sequential LED Headlight Installation
- 2016+ Toyota Tacoma Sequential LED Tail Light Installation
- 2008+ Toyota Sequoia Sequential LED Headlight Installation
- 2021+ Ford Bronco Sequential LED Headlight Installation
We are currently working to create full-length installation videos, detailing the exact process for installation of all of our products.
If you're one of our first customers, we thank you for your patience. Fortunately, installation is quite straightforward, since our lights are bolt-on replacements, and the wiring is plug-and-play. Most products can be installed by simply swapping the lights on your vehicle.
Replacing a headlamp or tail light requires removing access panels, and sometimes the bumper, in order to reveal the mounting bolts or nuts for the lamp. Once the fasteners are exposed, remove them, unplug the connectors, and remove the factory lamp. Usually, guidance on this process is available in the vehicle manual or in guides or videos available online (search "How to remove headlights on my vehicle").
Once your factory lamps are removed, install the new Form light in its place. Our lights are designed to connect to the original factory connectors. Based on your specific model year, you may need to use an included wiring adapter, to provide the correct connectors for your trim level.
Most of our headlamps include an extra power wire, with a fuse at one end. This extra wire will allow you to fully utilize the lamps, adding fulltime DRL function and/or startup sequences, even when the headlight doesn't normally get power.
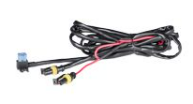
This wire should be connected in the fuse box, to any ignition power source such as the IGN circuit. Remove the factory fuse, and plug the harness in. Then, run the wire to each headlamp, and plug it in with the connector on each side.
If you have any questions regarding specific product installation, please contact us and we will be happy to help with the process. Again, thank you for your patience.