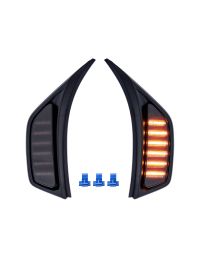
The 2020-2026 Jeep JT Gladiator LED Tail Lights add a modern LED appearance with improved visibility and functionality. This installation guide will provide you with detailed instructions on how to install the LED Tail Lights for the 2020-2026 Jeep JT Gladiator. Watch our installation video, or continue reading for step-by-step instructions below!
Table of Contents
Installation Video
Installation Tools
- 8mm socket
- Ratcheting wrench
- Phillips screwdriver
- Needle-nose pliers
- Pick tool
Installation Instructions
Step 1 — Open Tailgate
Open the rear tailgate using the handle located below the third brake light to access the tail light mounting area.
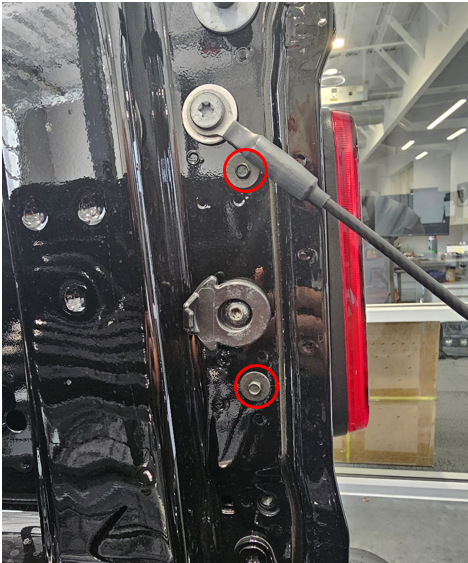
Step 2 — Remove Factory Bolts
Using an 8mm socket, remove the two bolts located on the inside edge of the tailgate opening. Set these aside for reinstallation.
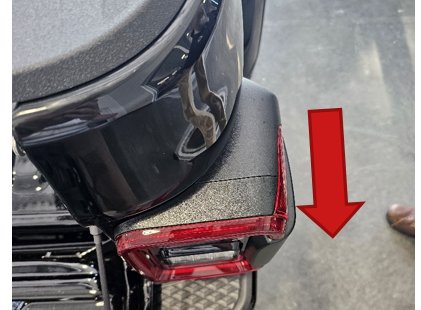
Step 3 — Remove Factory Tail Light
Pull the tail light straight rearward. Apply steady force until the alignment pins release from the body.
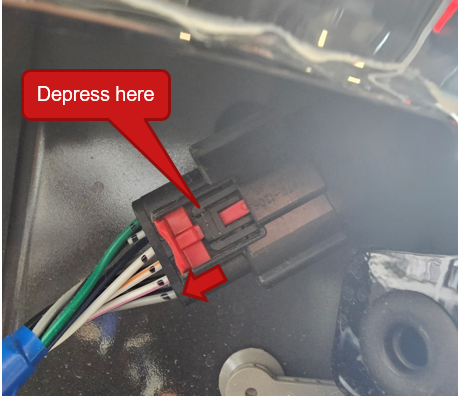
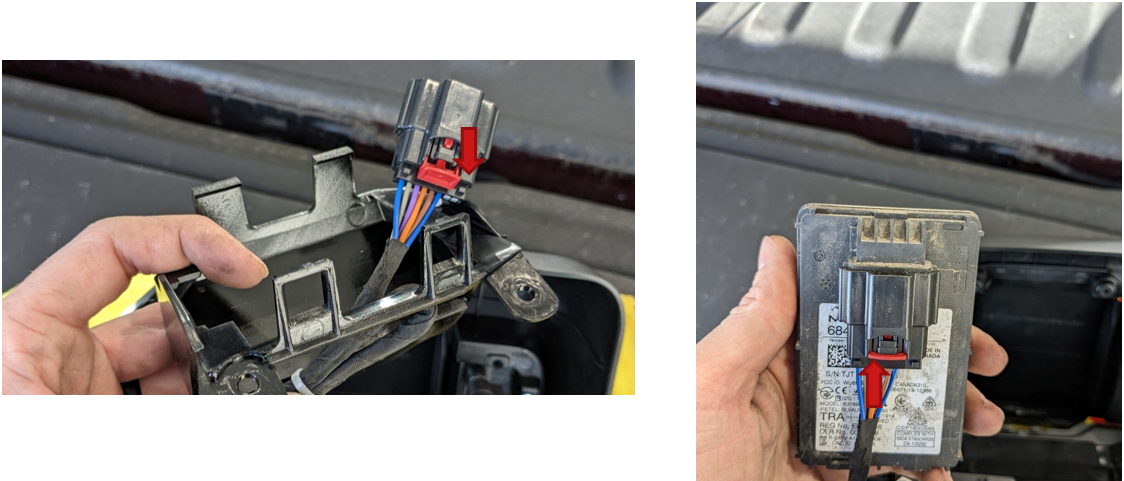
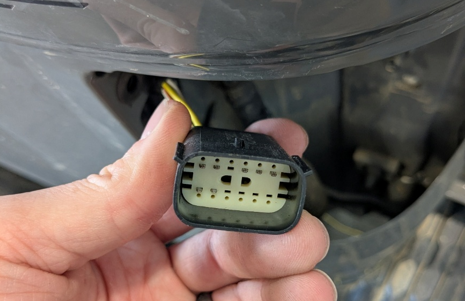
Step 4 — Disconnect Wiring Harness
Pull down the red locking tab on the connector, press the release clip, and disconnect the factory tail light harness.
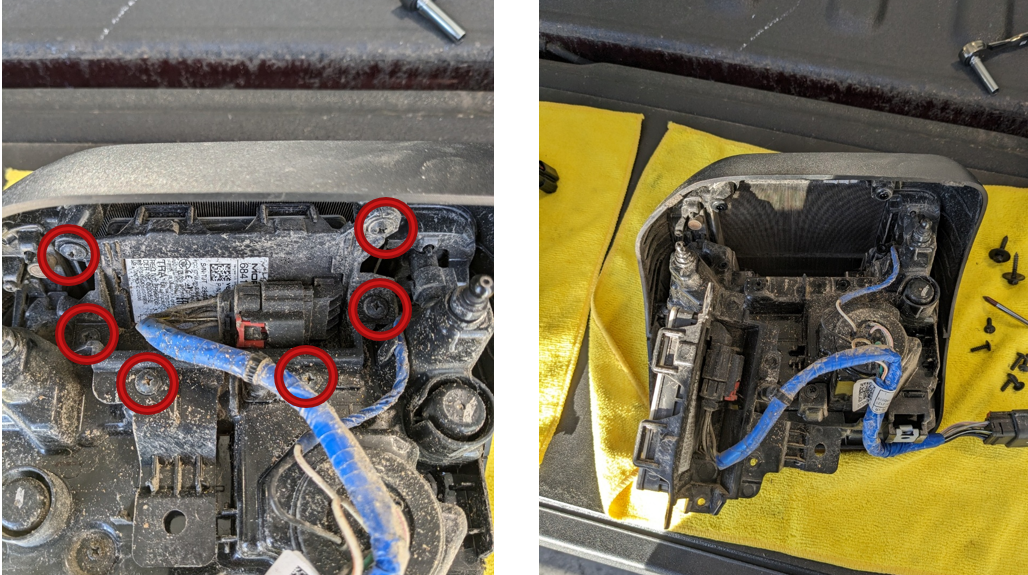
Step 5 — Remove Blind Spot Module
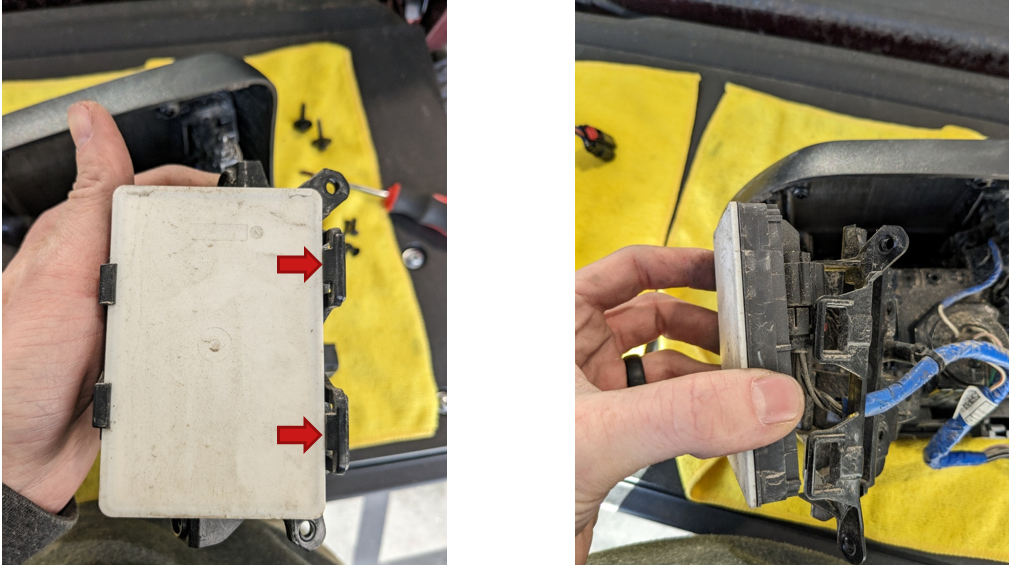
If equipped, locate the blind spot monitoring (BLIS) module mounted to the back of the factory tail light. Remove the six Phillips screws securing the module.
Slide the red locking tab on the BLIS connector, press the release tab, and unplug the module. Carefully unclip the module from the housing by releasing the retaining clips.
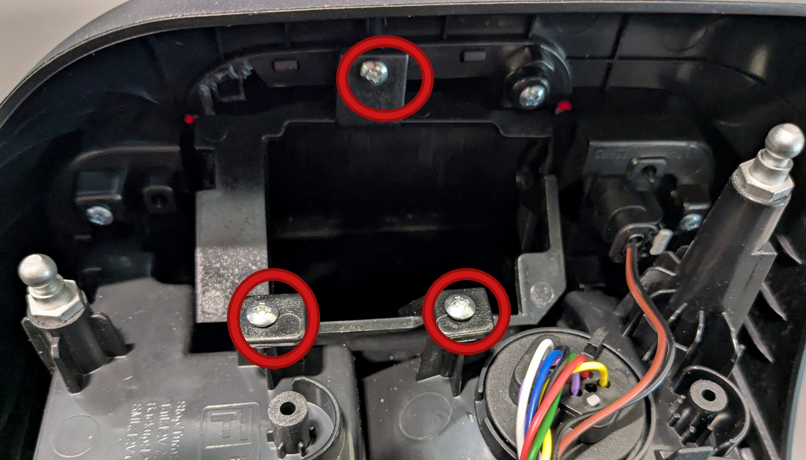
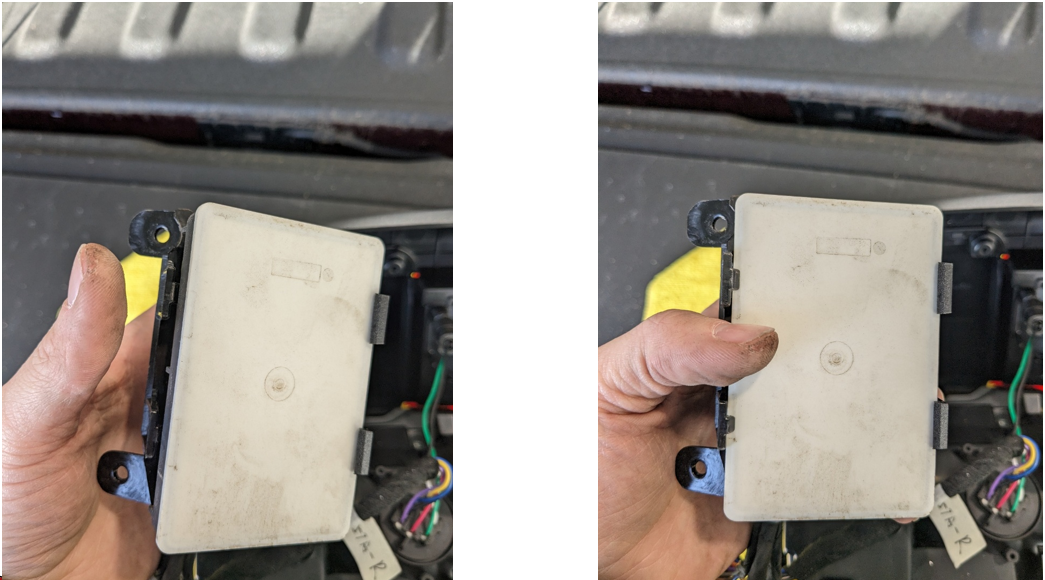
Step 6 — Transfer Blind Spot Module to New Tail Light
On the new FORM tail light, unscrew the 3 Phillips screws to remove the blind spot mounting bracket.
Feed the BLIS wiring connector through the mounting bracket on the new FORM tail light. Reconnect the module by plugging in the connector and sliding the red locking tab back into place.
Position the module by engaging the larger clips first, then press down to snap it into the smaller retaining clips. Secure the module using the provided mounting screws. Do not overtighten.
Step 7 — Tap Front Turn Signal Wire
Open the hood and locate the daytime running light (DRL) connector near the front fender. Identify the white and green wire in pin 2 of the connector.
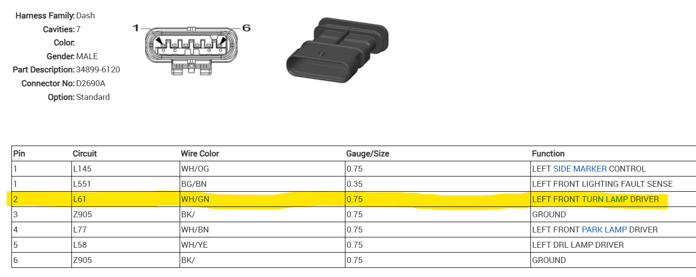
Using a T-tap connector, tap into the white and green wire, then connect the yellow signal wire from the tail light harness to the T-tap.
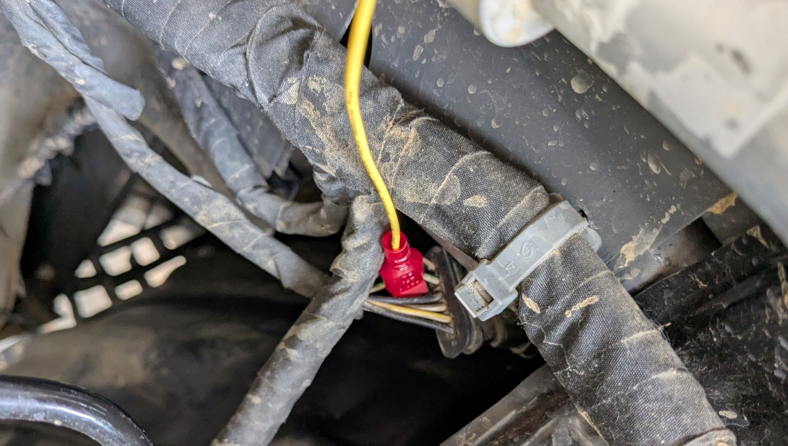
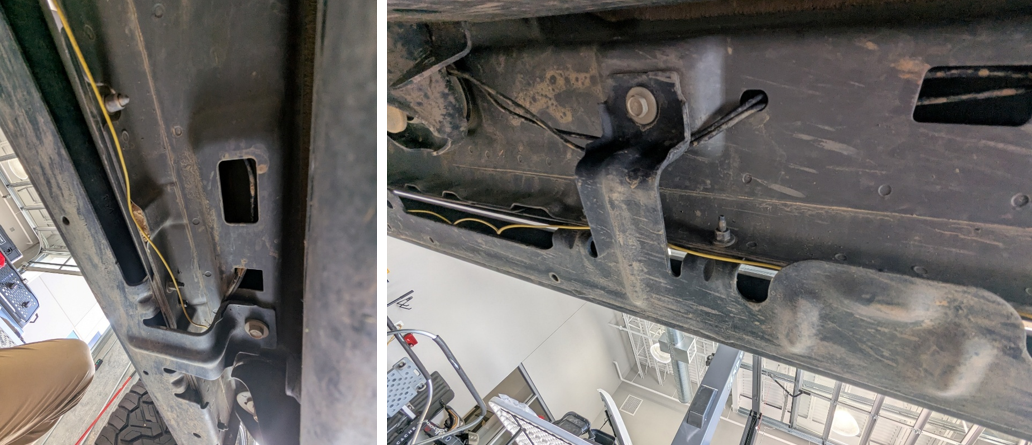
Step 8 — Route Turn Signal Wire to Rear
Route the yellow wire from the engine bay down toward the frame, then along the underside of the vehicle toward the rear. Secure the wire along the frame using zip ties, avoiding heat sources and moving components.
Continue routing the wire until it reaches the tail light pocket.
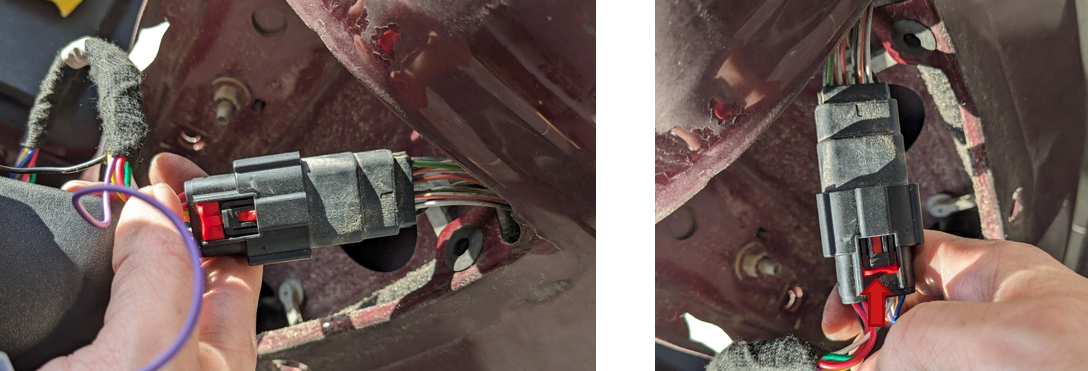
Step 9 — Insert Turn Signal Pin into Connector
Using a pick tool or needle-nose pliers, remove the center connector lock from the tail light connector.
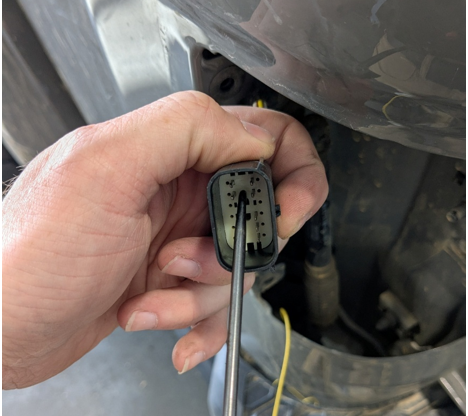
Insert the yellow wire terminal into pin 3 of the connector. This position is located between the white/brown wire and the white/orange wire.

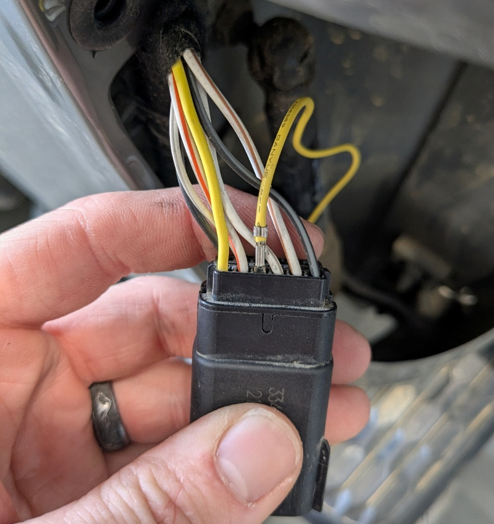
Ensure the terminal is fully seated, then reinstall the connector lock to secure the pin in place.
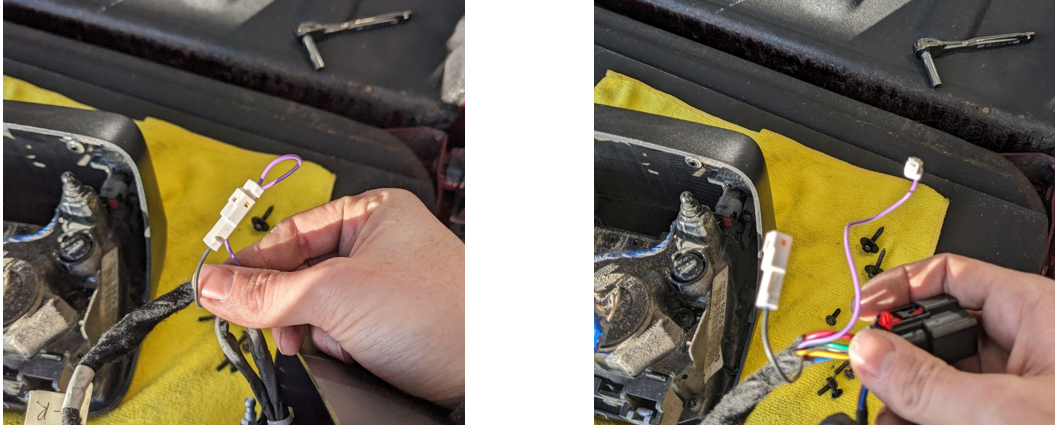
Step 10 — Configure Startup Sequence
To disable the startup animation and sequential turn signal, leave the purple wire connected. To enable these features, disconnect the purple wire.
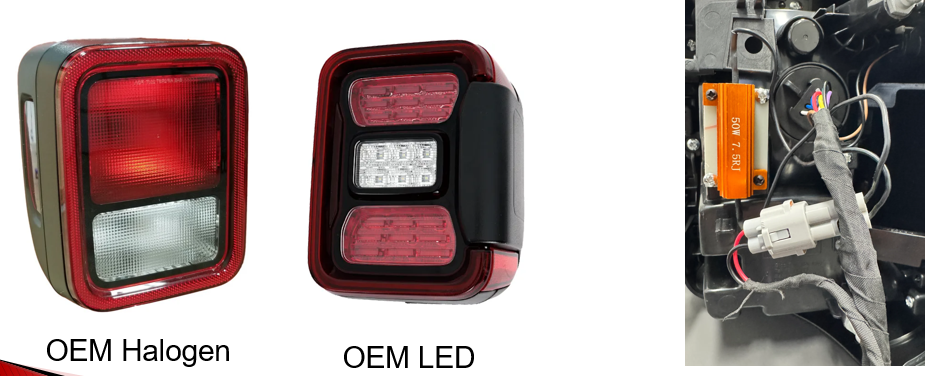
Step 11 — Install Resistor (If Required)
If your vehicle originally came equipped with halogen tail lights, install the included resistor to prevent hyperflashing.
If your vehicle has factory LED tail lights, the resistor can remain disconnected. If using a programming module such as a TASER, the vehicle can be configured for LED lighting and the resistor may also be omitted.
Step 12 — Connect New Tail Light
Plug the new tail light connector into the factory harness and push the red locking tab into place to secure the connection.
Step 13 — Mount Tail Light
Align the mounting pins and press the tail light firmly into position. While applying forward pressure, reinstall the two 8mm bolts to secure the tail light.
Step 14 — Repeat on Opposite Side
Repeat all previous steps on the other side of the vehicle.
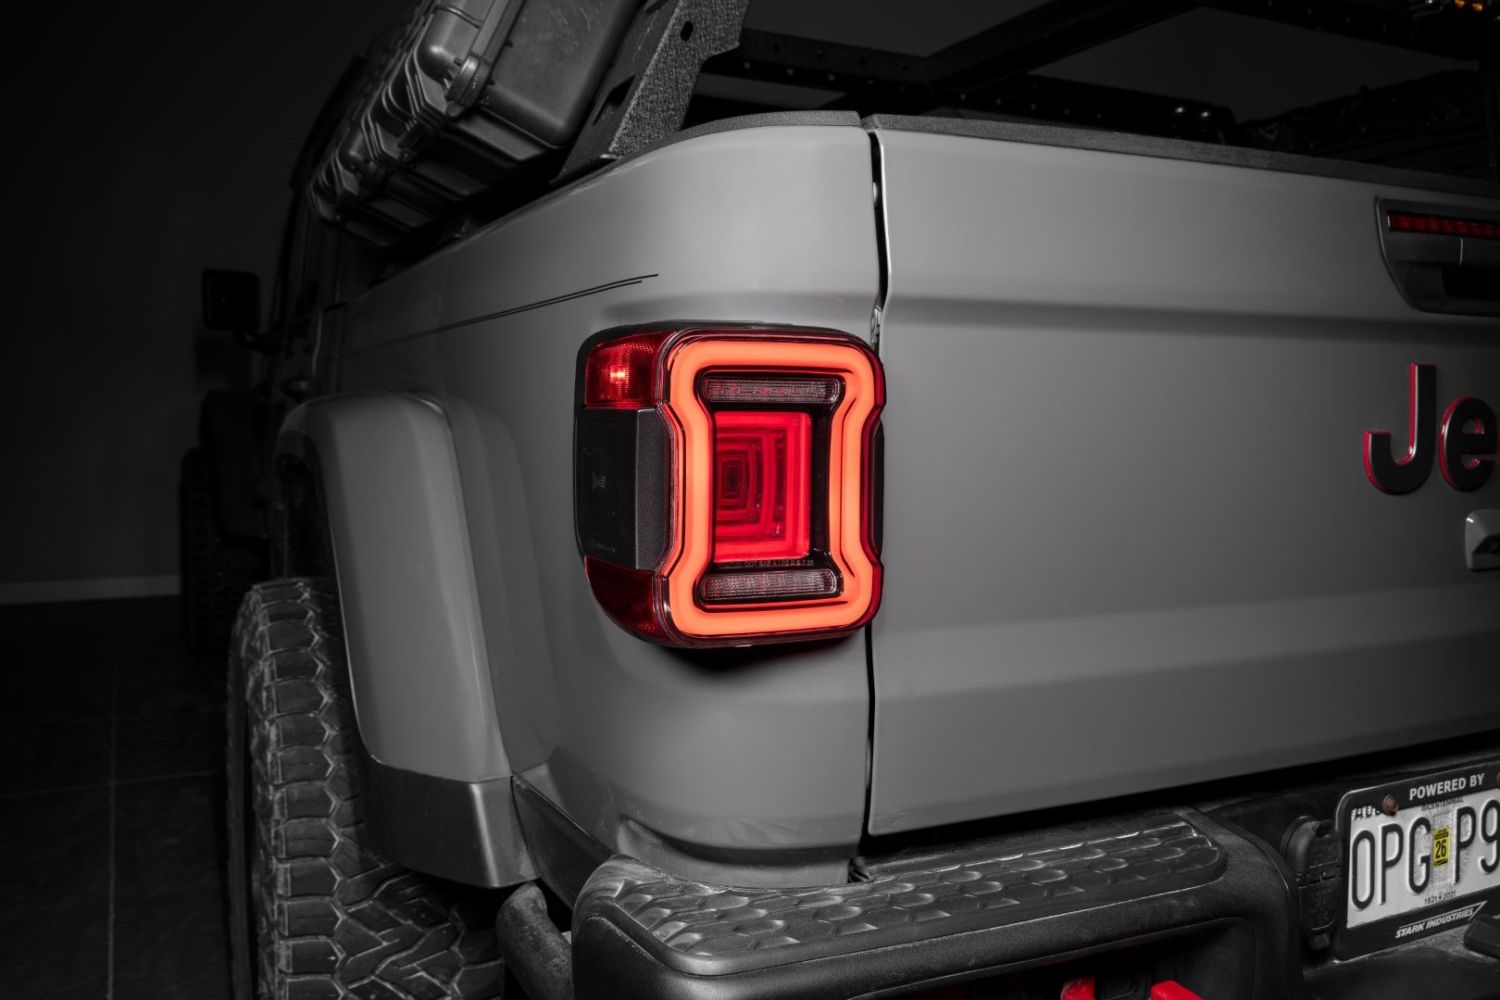
The installation is now complete. Enjoy your new 2020-2026 Jeep JT Gladiator LED Tail Lights!
Questions About the Installation?
If you have any questions about installing the LED Tail Lights for the 2020-2026 Jeep JT Gladiator, contact us via our support page.
Where Can I Buy the LED Tail Lights for the 2020-2026 Jeep JT Gladiator?
If you're ready to upgrade your Jeep Gladiator with LED Tail Lights, visit FORM Lighting and explore our latest vehicle-specific lighting upgrades.
Want to know more about FORM Lighting products? Visit FORM Lighting and subscribe to our newsletter for new product releases and more!
This Installation Guide is for the following SKU: FL0021, FL0022