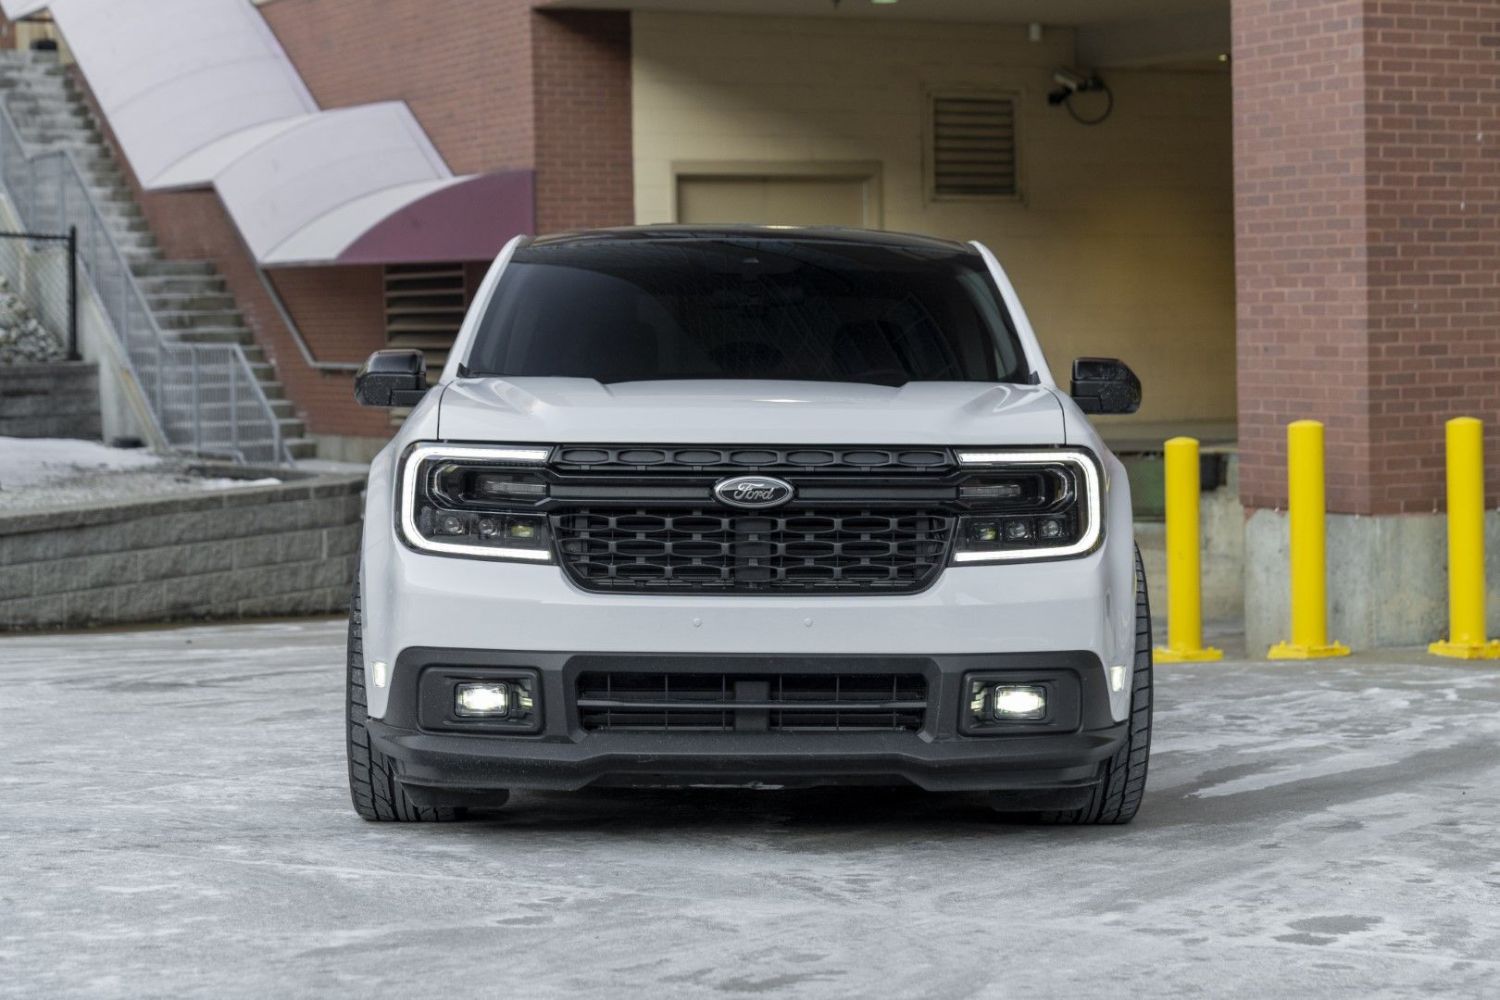
The 2022-2024 Ford Maverick Sequential LED Projector Headlights add modern sequential turn signals, bright LED projector output, and an aggressive new front-end appearance. This installation guide will provide you with detailed instructions on how to install the 2022-2024 Ford Maverick Sequential LED Projector Headlights. Watch our installation video or continue reading below for detailed instructions!
Table of Contents
- Installation Tools
- Installation Video
- Installation Instructions
- Questions About the Installation?
- Where Can I Buy the 2022-2024 Ford Maverick Sequential LED Projector Headlights?
Installation Tools
- 7mm socket
- 10mm socket
- T30 Torx bit
- Long Phillips #2 screwdriver (8")
- Pry tool or trim removal tool
Installation Video
Installation Instructions
Step 1 — Open Hood
Locate the hood latch inside the vehicle and pull twice to release the hood. Open the hood and secure it using the prop rod.
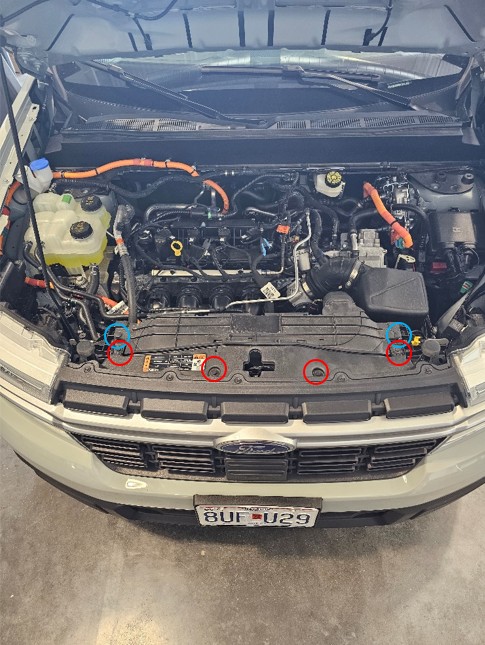
Step 2 — Remove Upper Bumper Hardware
Using a 10mm socket, remove the four bolts securing the top of the bumper. Use a pry tool to remove the two push clips along the upper radiator support.
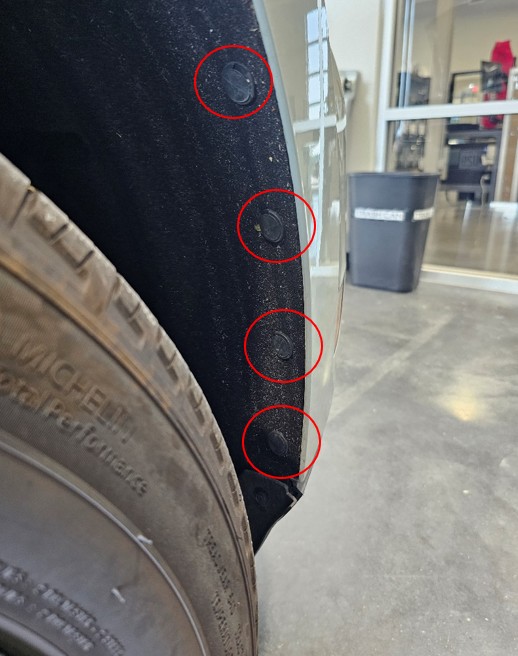
Step 3 — Remove Wheel Liner Clips
Use a trim removal tool to remove the five pop clips securing the front wheel liner on one side. Repeat this process on the opposite side.
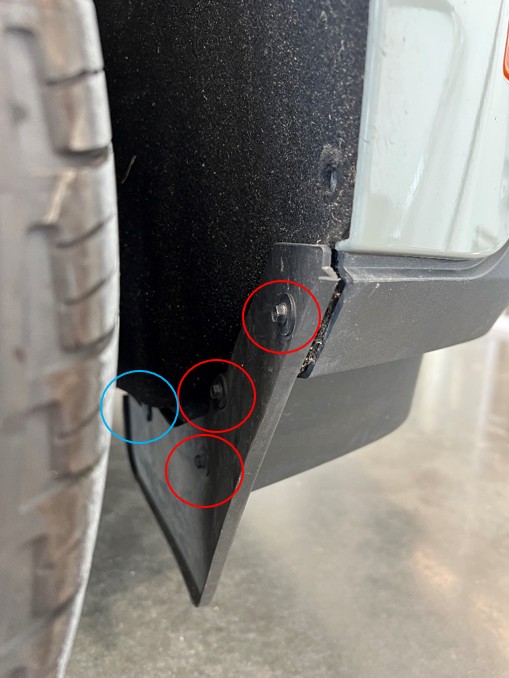
Step 4 — Remove Lower Splash Guard Hardware
Using a 7mm socket, remove the three bolts securing the front splash guard. Remove the additional pop clip with a trim tool. Repeat on the other side.
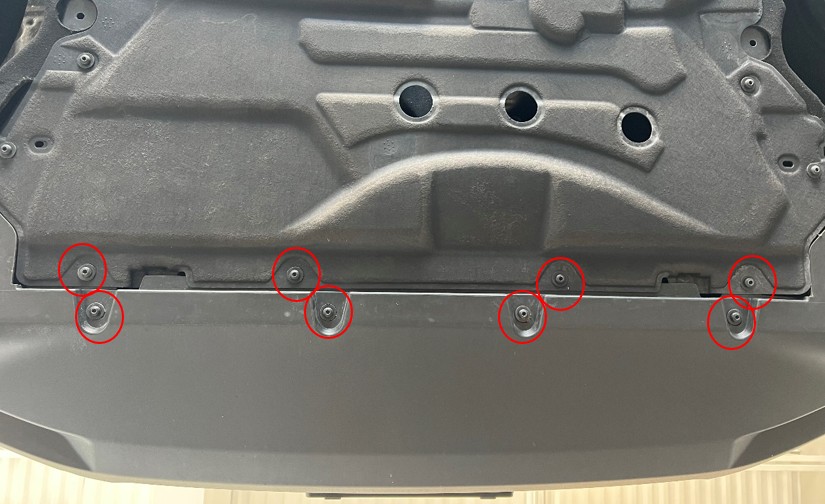
Step 5 — Remove Lower Bumper Bolts
Use a T30 Torx bit to remove the eight bolts located underneath the bumper.
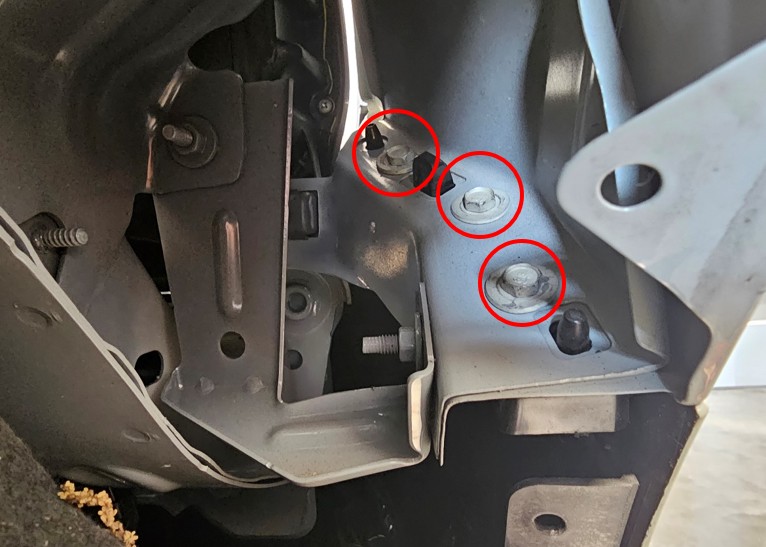
Step 6 — Remove Fender-to-Bumper Bolts
Behind each fender liner, remove the three 10mm bolts securing the bumper to the quarter panel. Repeat on both sides of the vehicle.
Step 7 — Release Bumper from Quarter Panels
With all hardware removed, gently pull downward and outward to release the bumper from the quarter panel clips on each side.
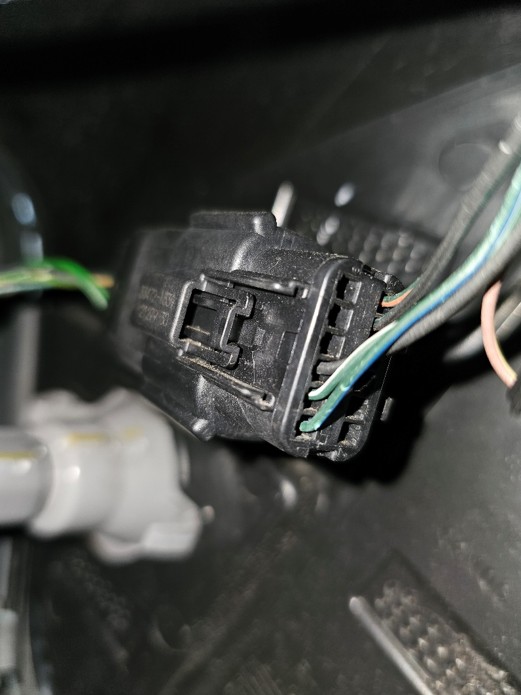
Step 8 — Disconnect Bumper Harness
Through the passenger-side fender liner, disconnect the factory electrical connector attached to the bumper by depressing the locking tab and separating the connection.
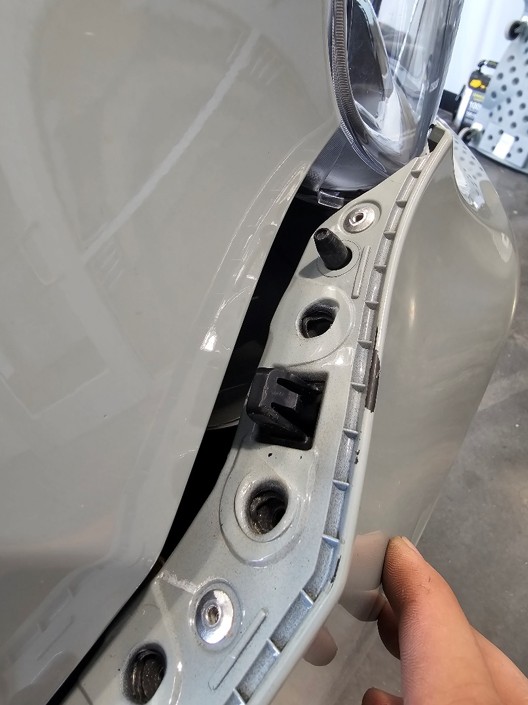
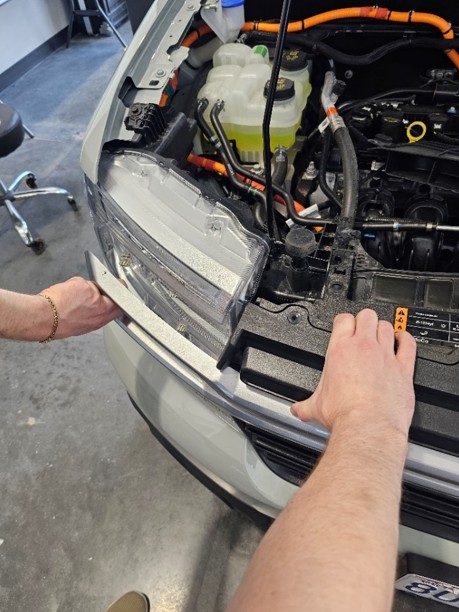
Step 9 — Remove Headlight Trim Molding
Gently pull the trim molding away from the vehicle to release the metal retaining clips holding it in place. Repeat on the opposite side.
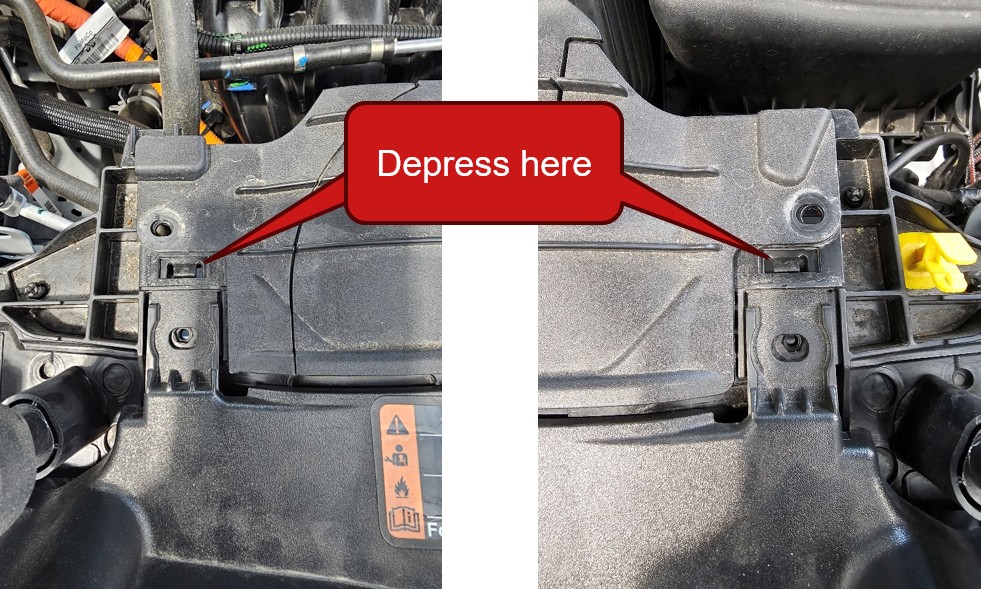
Step 10 — Remove Bumper Assembly
Depress the clips on either side of the radiator shroud while pulling the grille forward. Once released, carefully remove the bumper assembly from the vehicle.
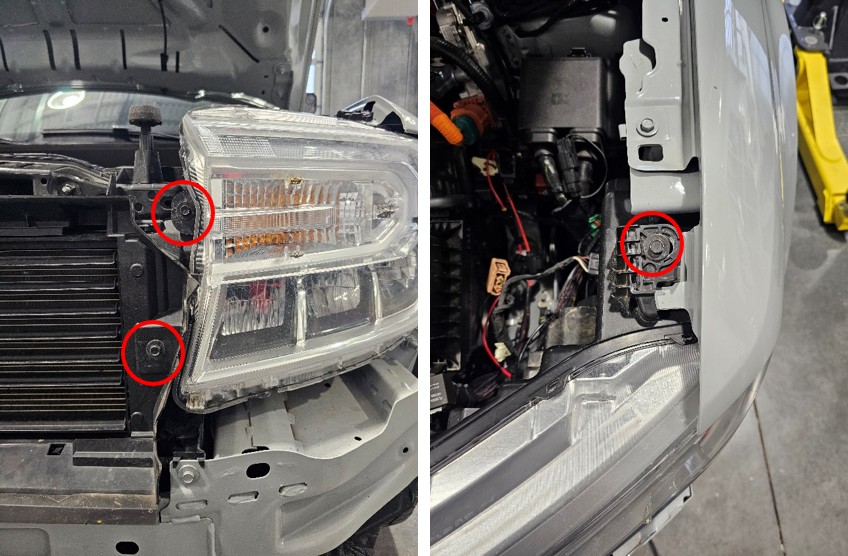
Step 11 — Remove Factory Headlight Hardware
Using a 10mm socket, remove the three bolts securing the factory headlight assembly.
Step 12 — Disconnect Headlight Connectors
Depress the locking tabs and disconnect the two electrical connectors from the factory headlight.

Step 13 — Release Harness Retaining Clip
Use a trim tool to remove the harness retaining clip from the headlight housing.

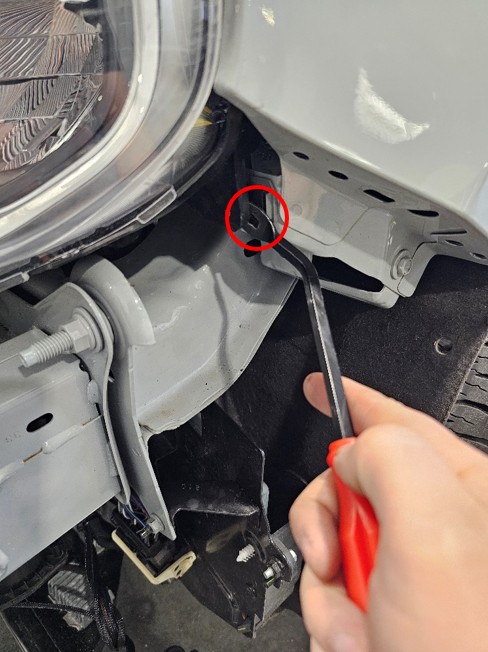
Step 14 — Release Outer Ball Clip
Using a trim tool or pry tool, carefully release the outer ball clip securing the headlight assembly.
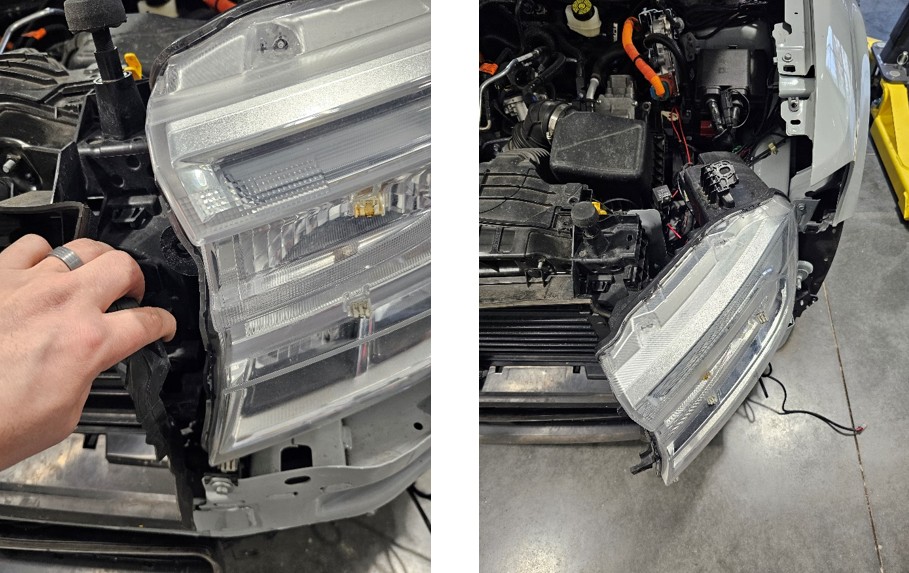
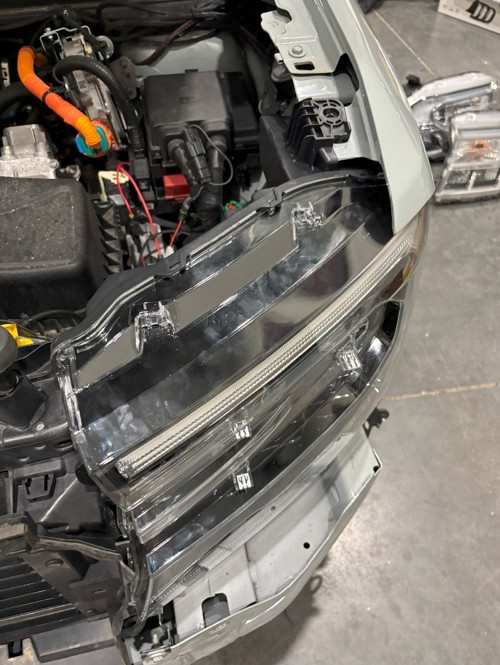
Step 15 — Remove Factory Headlight
Gently move the radiator funnel aside and pull the headlight assembly forward and out of the vehicle. Repeat steps 11-15 for both sides.
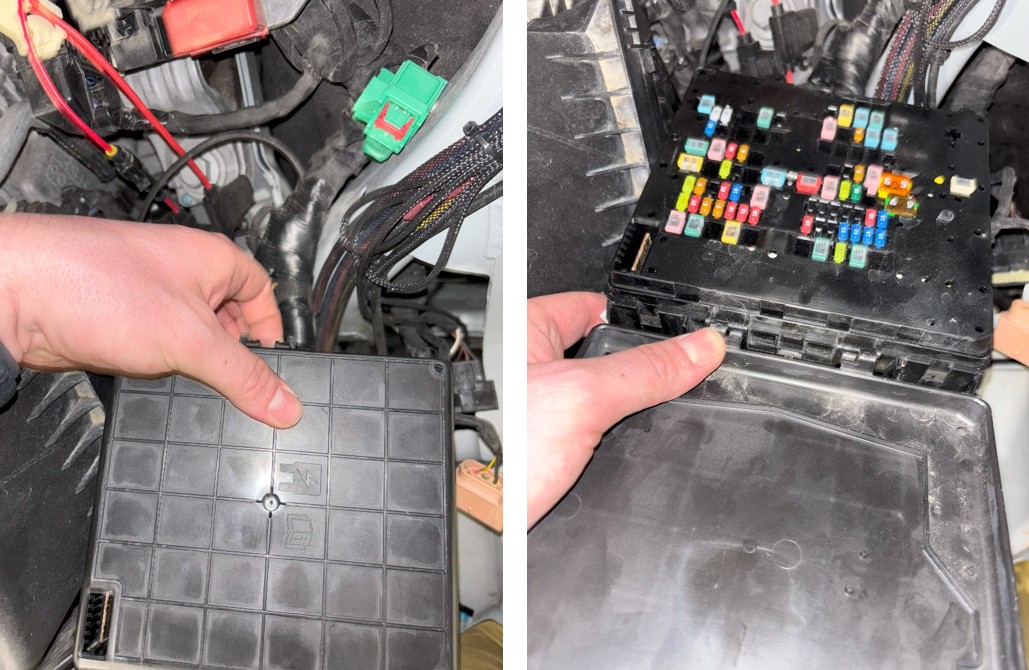
Step 16 — Access Fuse Box
Locate the fuse box and remove the cover by depressing the center locking tab and lifting upward.
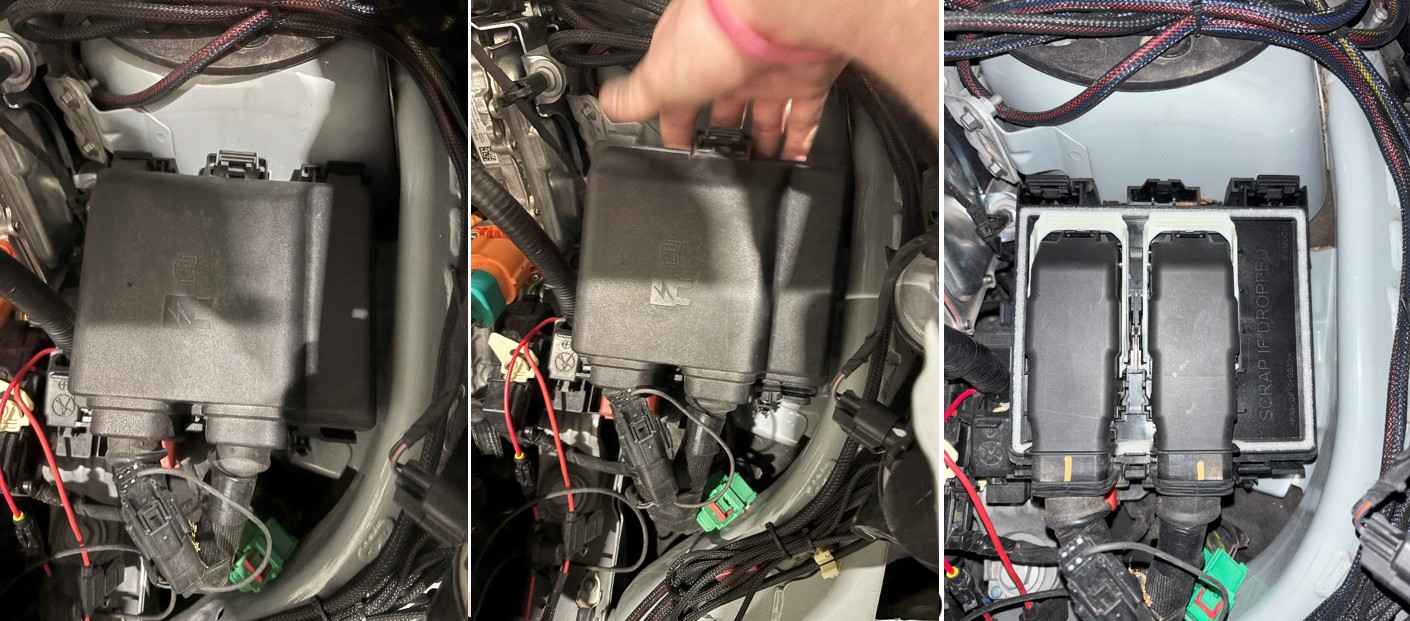
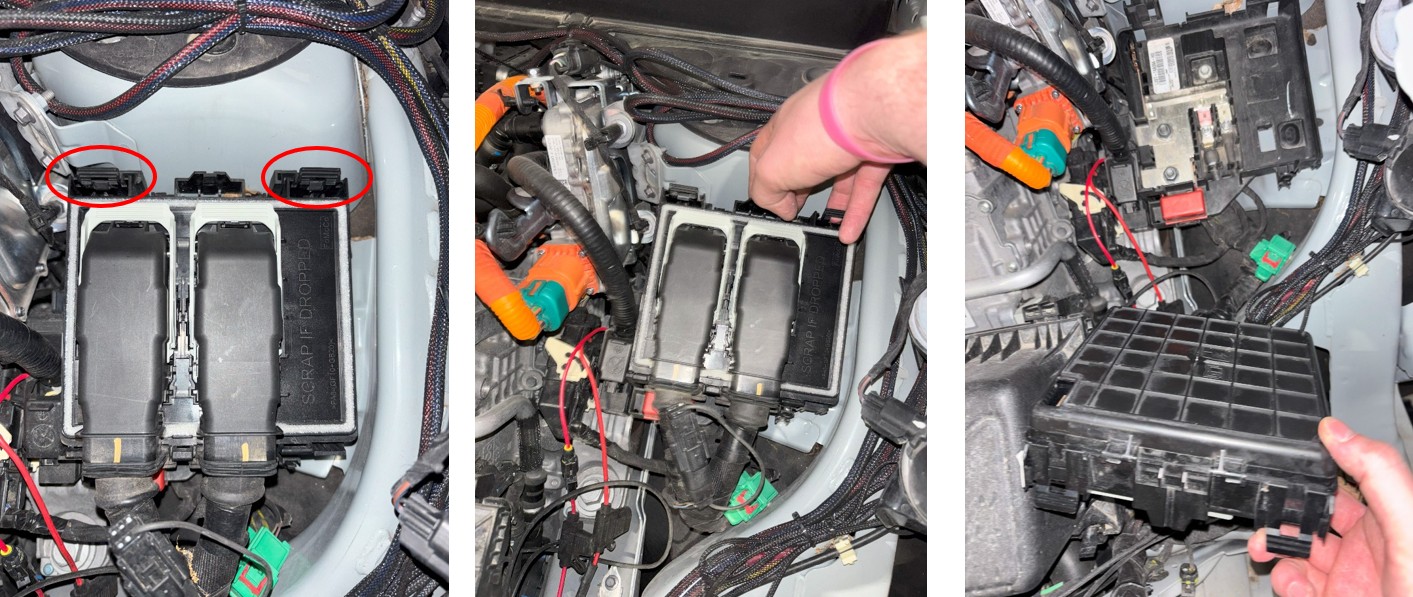
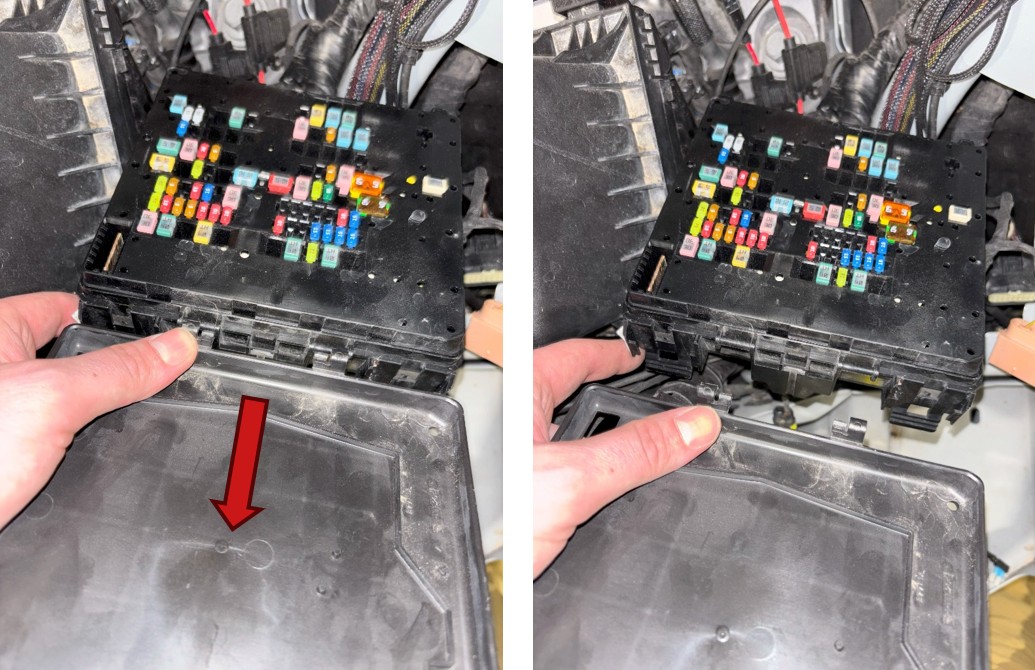
Step 17 — Remove Fuse Box from Mount
Depress the two retaining tabs securing the fuse box and carefully lift it out of its mounting bracket. Open the fuse box cover by lifting the center locking tab.
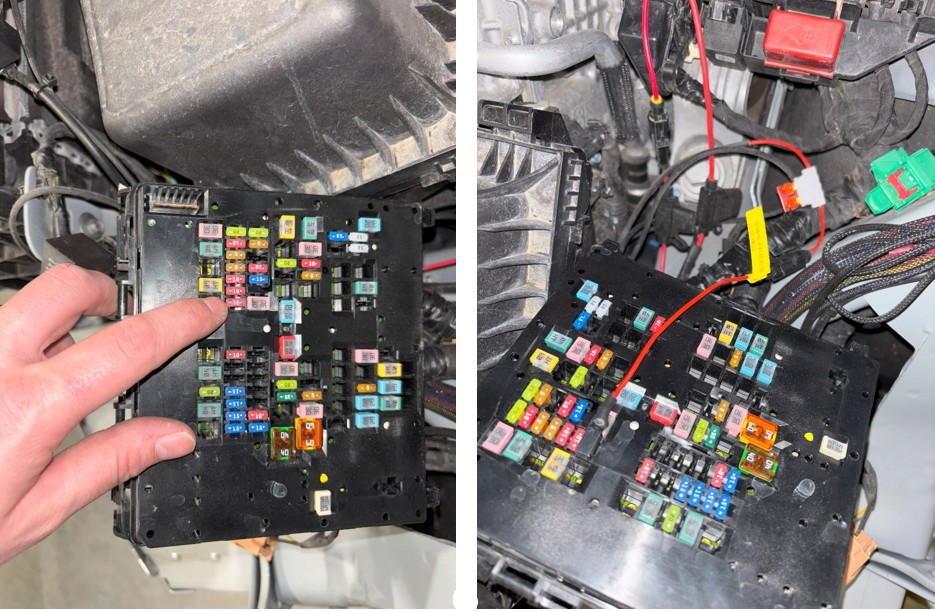
Step 18 — Install Add-A-Fuse Harness
Remove the designated 10-amp fuse and install the supplied add-a-fuse harness in the same orientation. Ensure the power lead exits the fuse box properly.
Step 19 — Reinstall Fuse Box
Reinstall the fuse box into its mount while leaving the harness lead accessible outside the box. Secure the fuse box and reinstall the cover.
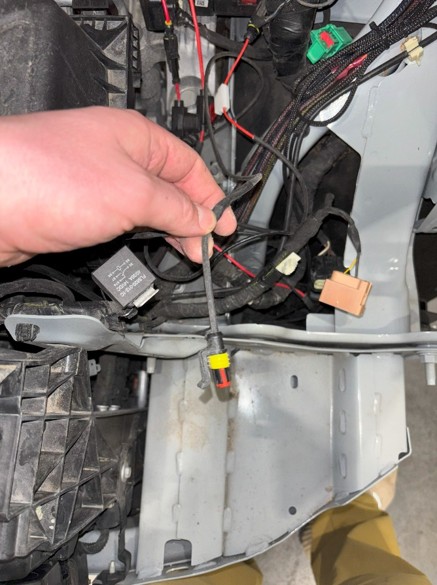
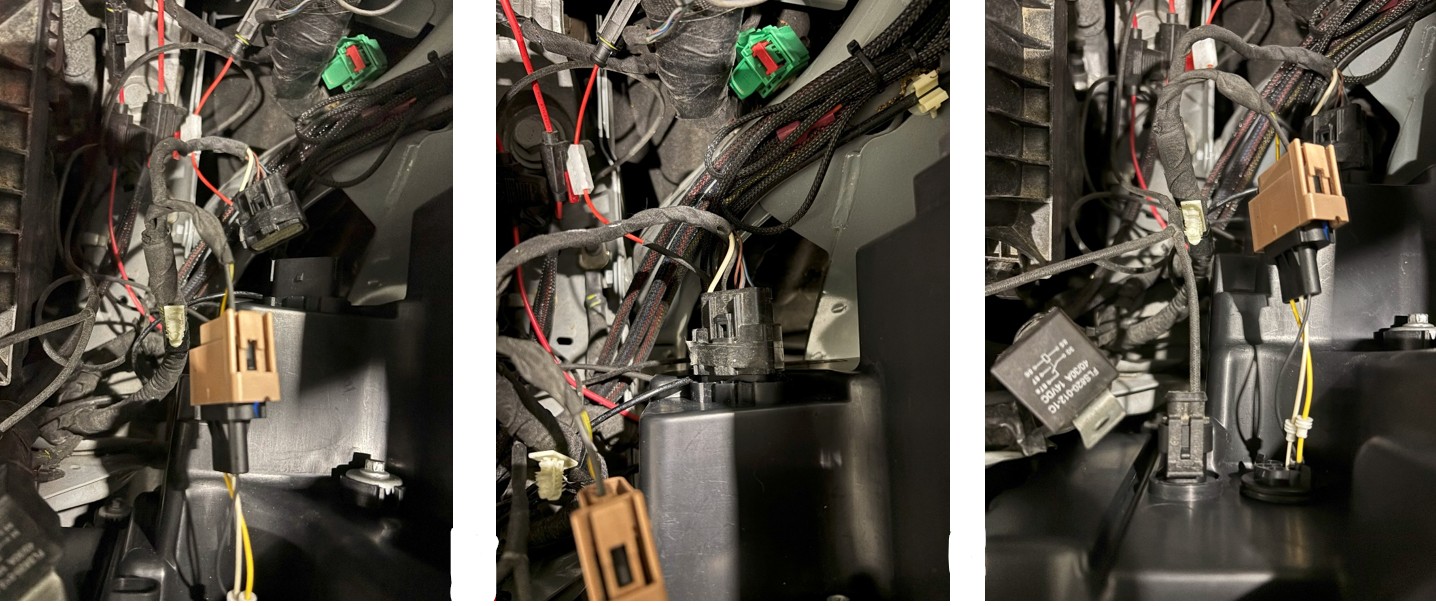
Step 20 — Route Add-A-Fuse Harness
Route the shorter lead to the driver-side headlight cavity and the longer lead across the front of the vehicle to the passenger-side headlight cavity, following factory wiring paths and securing away from moving components.

Step 21 — Install FORM Headlights
Install the new headlight assembly into position and secure it using the factory hardware removed earlier. Repeat on the opposite side.
Step 22 — Connect Wiring and Test
Connect the factory wiring connectors to the FORM headlight, ensuring each connection clicks securely into place. Connect the add-a-fuse harness lead. Repeat on the opposite side and test all lighting functions.
Step 23 — Reassemble Front End
Reinstall the bumper and all hardware by reversing steps 2 through 10. Ensure all clips and fasteners are fully secured.
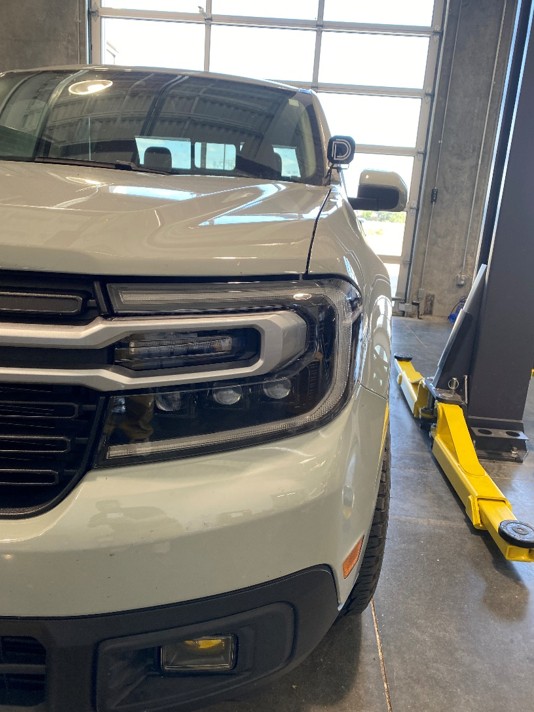
The installation is now complete. Enjoy your new 2022-2024 Ford Maverick Sequential LED Projector Headlights!
Questions About the Installation?
If you have any questions about installing the 2022-2024 Ford Maverick Sequential LED Projector Headlights, contact us via our support page.
Where Can I Buy the 2022-2024 Ford Maverick Sequential LED Projector Headlights?
If you're ready to upgrade your ride with the 2022-2024 Ford Maverick Sequential LED Projector Headlights, visit FORMlights.com.
Want to know more about FORM Lighting products? Visit FORMlights.com and explore our latest vehicle-specific lighting upgrades.
This Installation Guide is for the following SKU: FL0084