
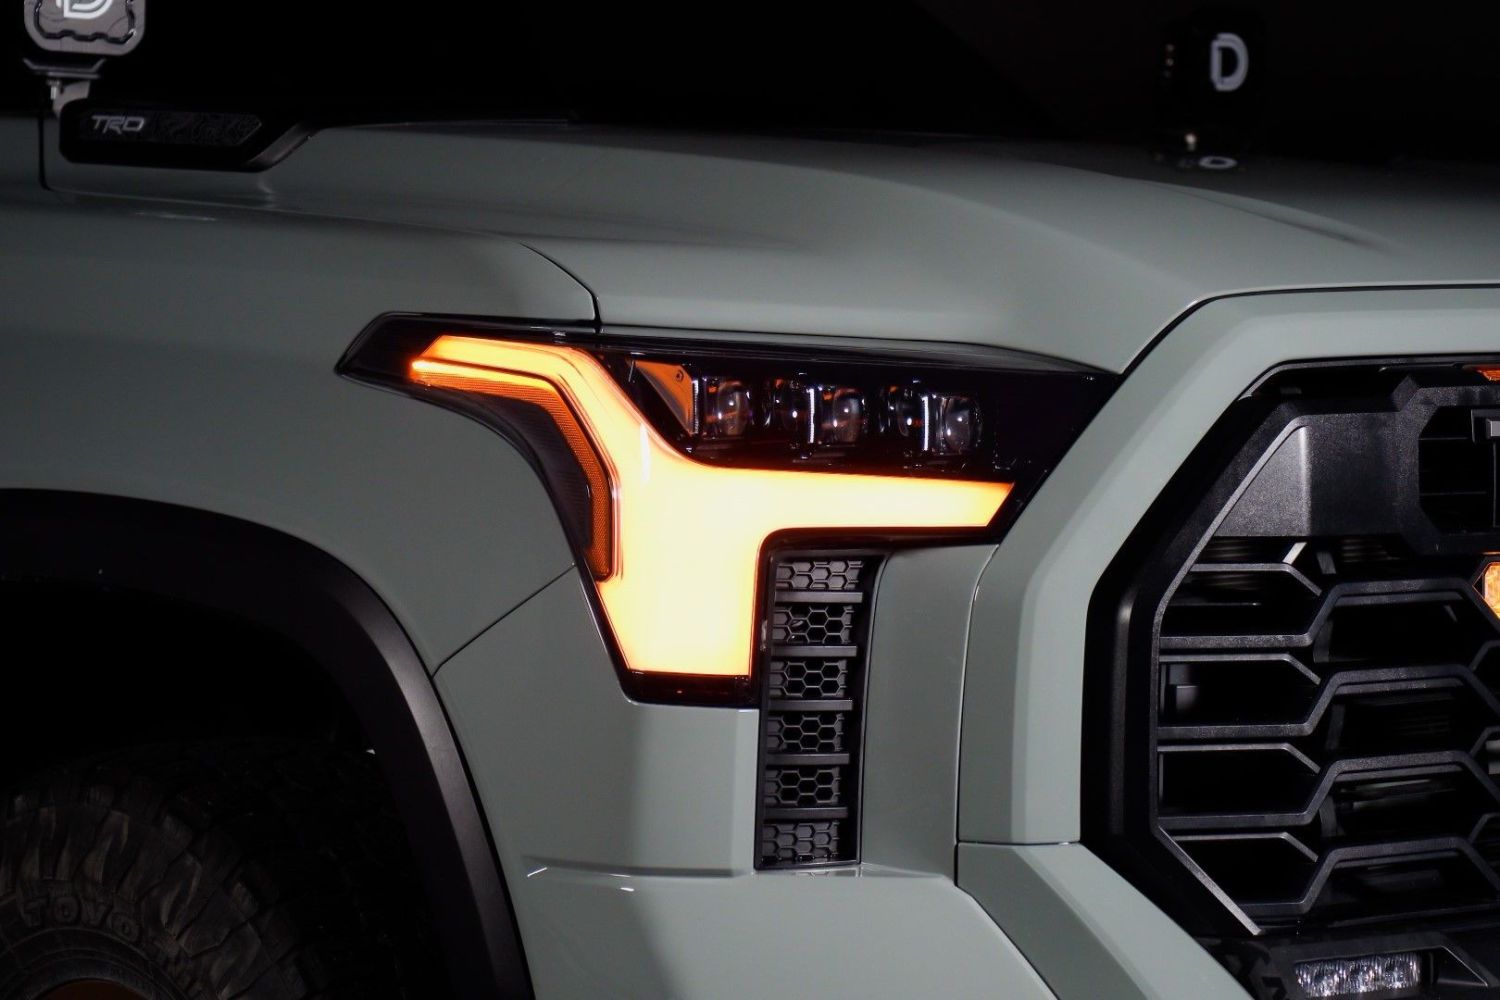
The LED Headlights for the 2022+ Toyota Tundra and LED Headlights for the 2023+ Toyota Sequoia add upgraded LED lighting to your vehicle. This installation guide will provide you with detailed instructions on how to install the LED Headlights for the 2022+ Toyota Tundra and LED Headlights for the 2023+ Toyota Sequoia. Continue reading for step-by-step instructions below!
Table of Contents
- Installation Video
- Installation Tools
- Installation Instructions
- Aiming Instructions
- Headlight Programming
- Questions About the Installation?
- Where Can I Buy the LED Headlights for the 2022+ Toyota Tundra & 2023+ Toyota Sequoia?
Installation Video
Installation Tools
- 10mm socket
- 12mm socket
- Long extension
- Long #2 Phillips screwdriver
- Trim removal tool
- Pliers
Estimated Installation Time: 120 minutes.
Installation Instructions
Step 1 - Remove the top bolts
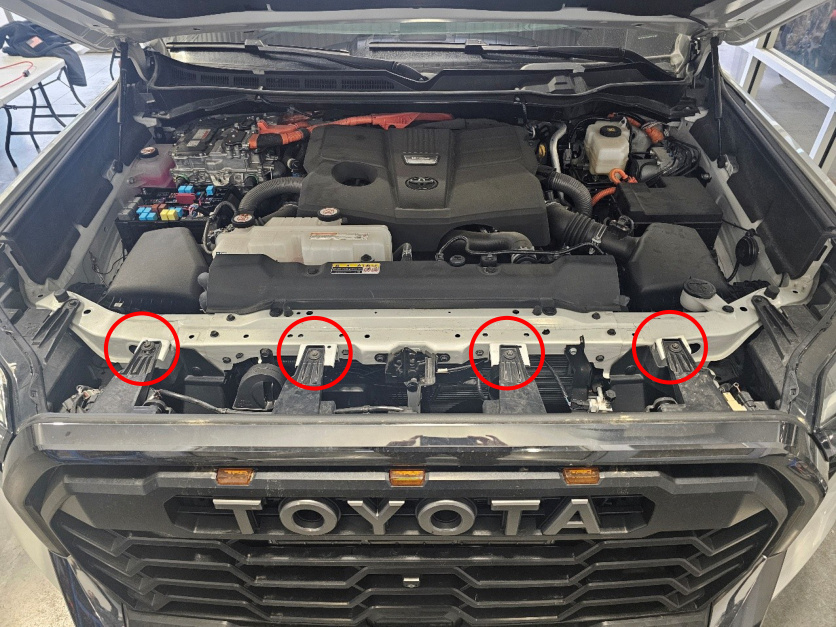
Use a 10mm socket to remove the four top bolts.
Step 2 - Disconnect the front connectors
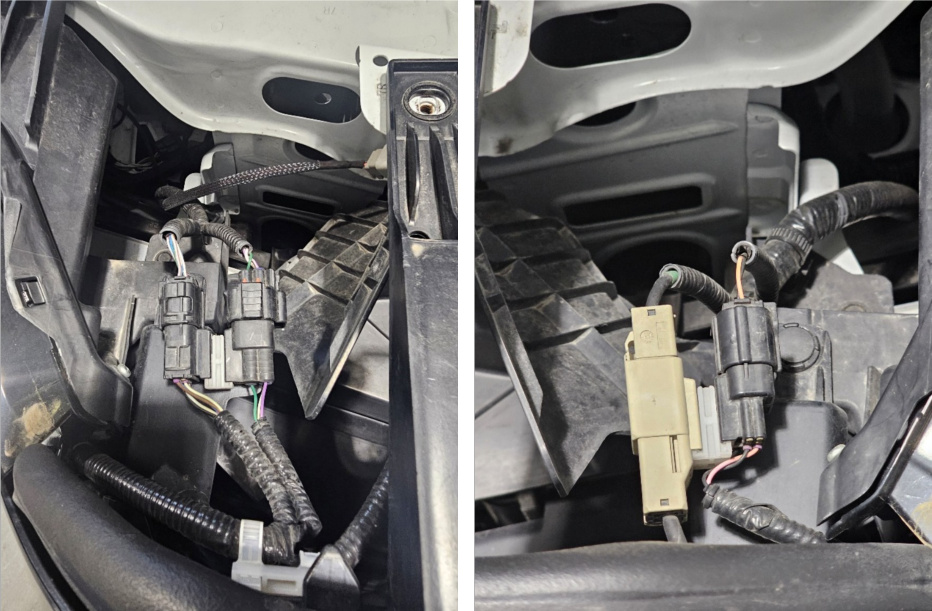
Disconnect the two connectors near the passenger-side headlight and the two connectors near the driver-side headlight.
Step 3 - Remove the push pins
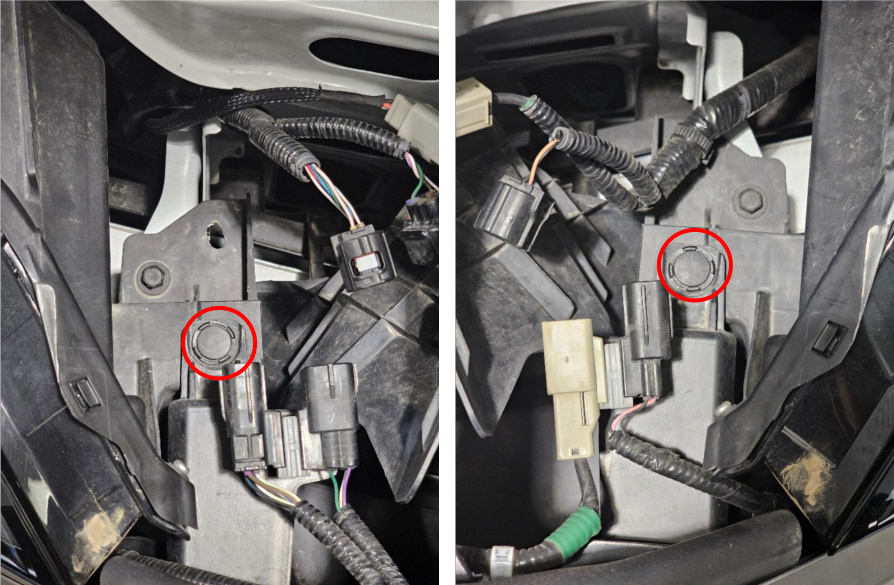
Use a trim removal tool to remove the two push pins near the passenger-side and driver-side headlights.
Step 4 - Remove the lower bolts
Use a 10mm socket to remove the four bolts underneath the front end.
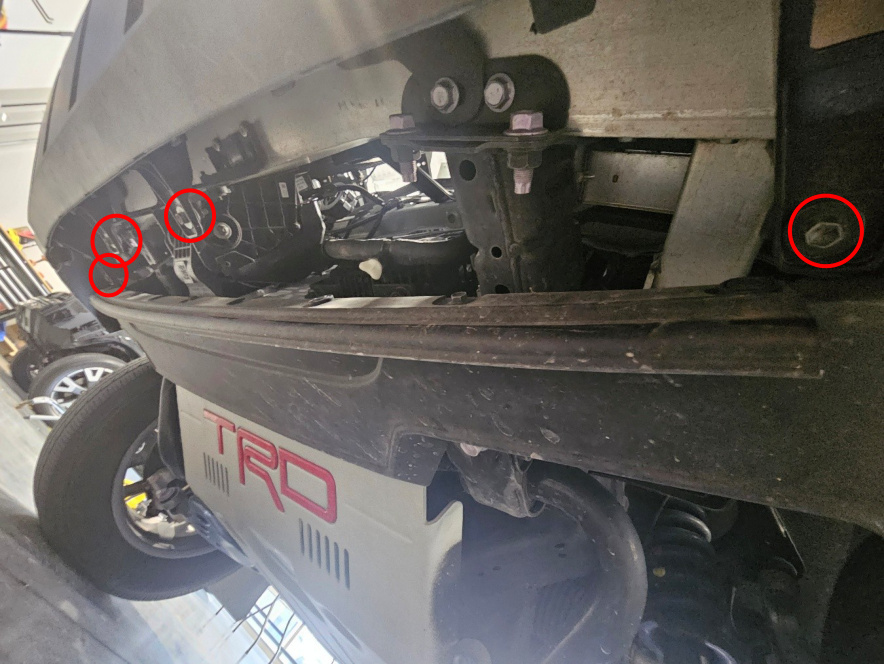
Step 5 - Remove the fender well bolts
Use a 10mm socket to remove five bolts from each front fender well. On trims without the automatic air dam, remove the two additional bolts underneath that hold the fender liner to the bumper.
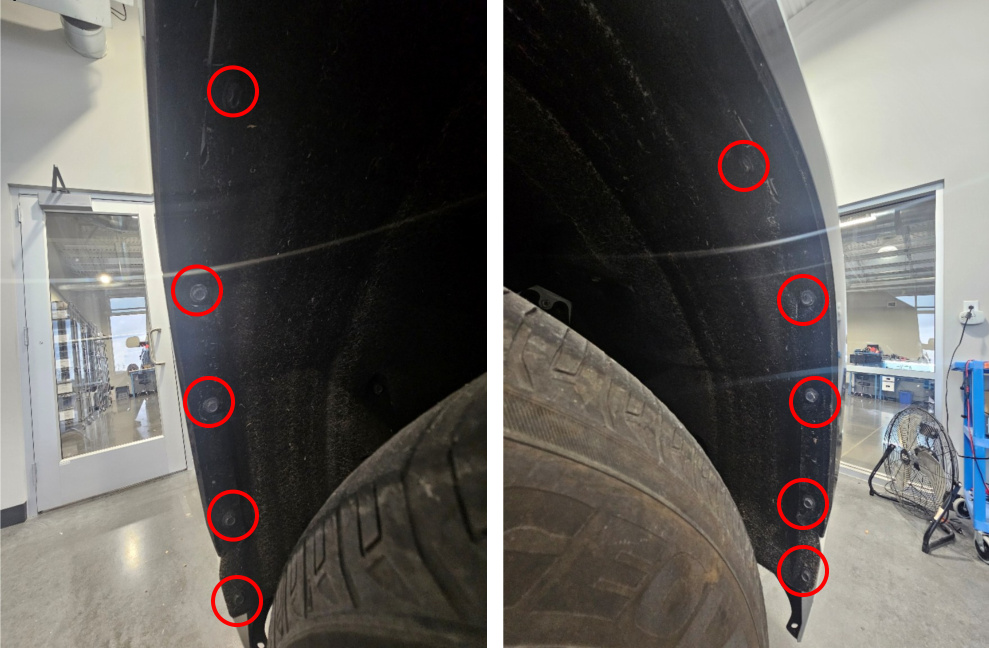
Step 6 - Release the fender flares
On the passenger side, push the fender liner aside and reach in to squeeze the two fender flare clips. Once the clips release, pull the fender flare away from the body. Repeat on the driver side.
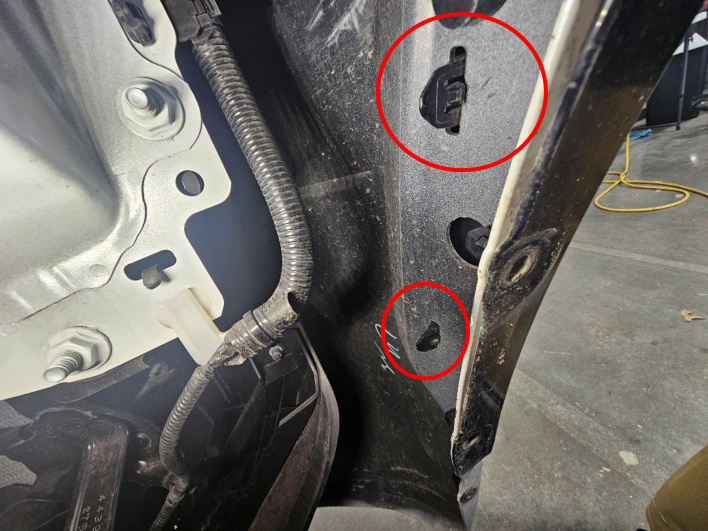
Step 7 - Remove the bumper support bolts
Use a 10mm socket with a long extension to remove the four bolts holding the mid bumper support structure.
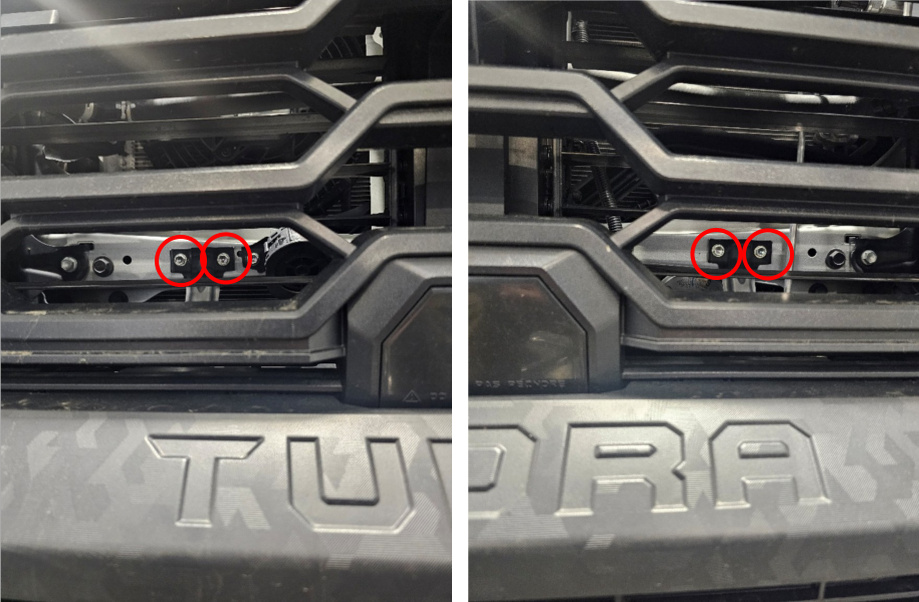
Step 8 - Remove the front end assembly
Release the bumper cover from the detent in the wheel well, then gently pull the bumper away from the body. Repeat on the other side and remove the front end assembly.
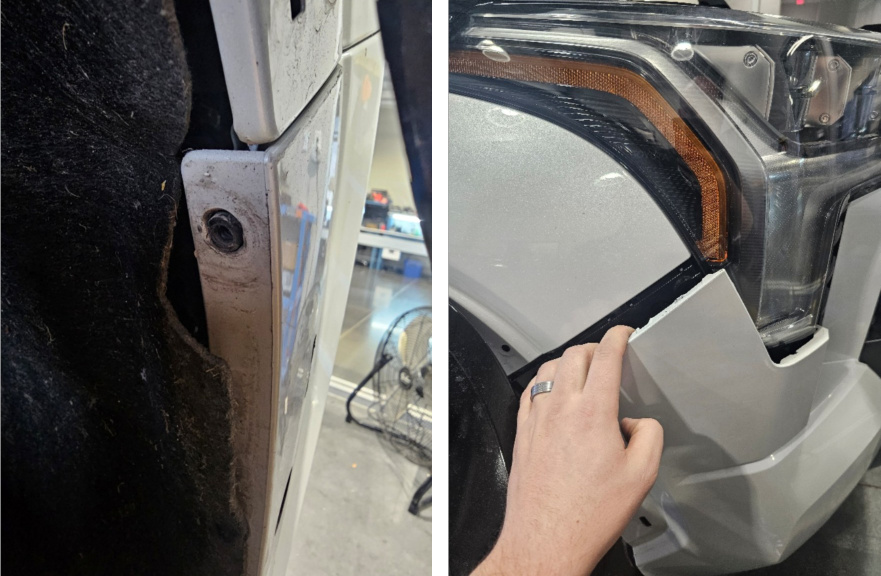
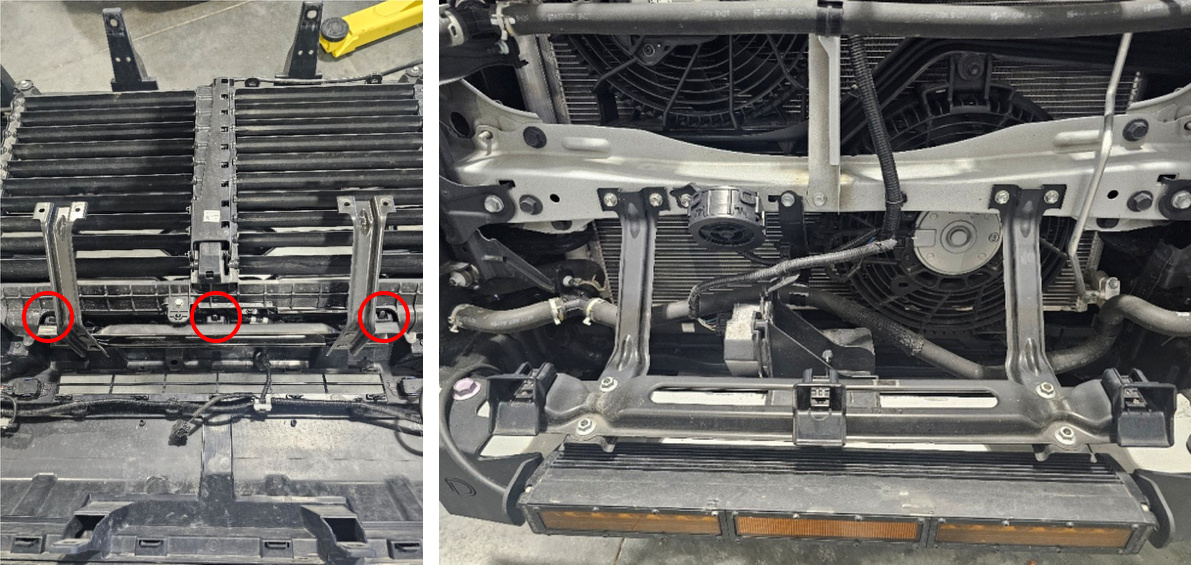
Step 9 - Reinstall the mid support bracket
Place the front end assembly on a cradle or padded surface. Release the three clips holding the mid support bracket to the bumper, then reinstall the bracket on the vehicle using the mounting locations from Step 7.
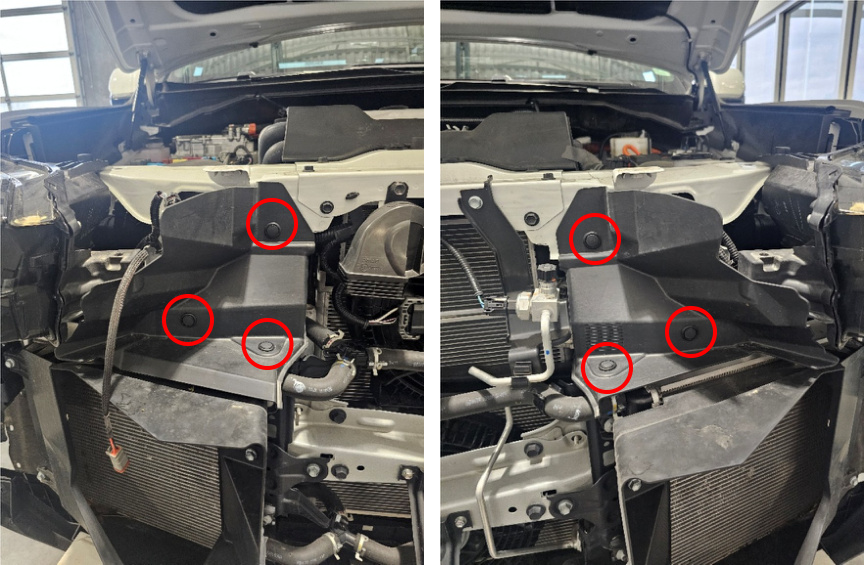
Step 10 - Remove the wind deflectors
Use a trim removal tool to remove the three push pins on the wind deflector next to each headlight. Pull the wind deflectors away once the pins are removed.
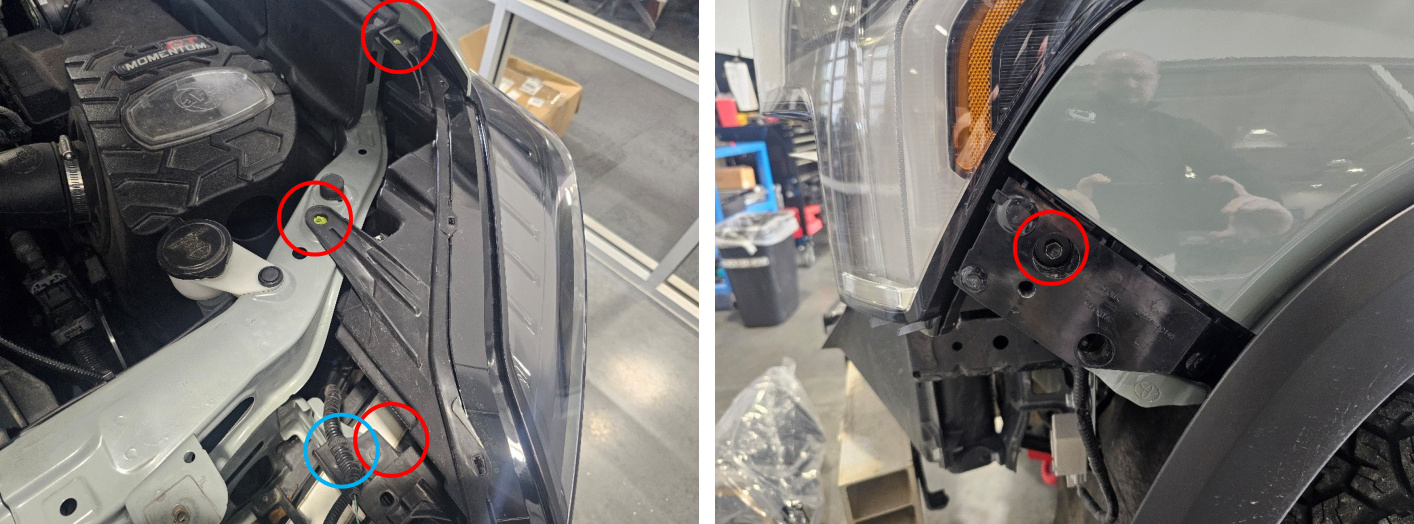
Step 11 - Release the driver-side headlight
Use a 10mm socket to remove the four screws securing the driver-side headlight. Use pliers to release the wiring harness clip.
Step 12 - Disconnect the factory headlight
Remove the factory headlight and disconnect its factory connectors. Reflector headlights have three connectors. Projector headlights have two connectors.
Vehicles with factory load-leveling air suspension do not have a headlight leveling motor harness. The FORM headlights include a sealed cap on the leveling motor to protect the pins from corrosion when this connection is unused.
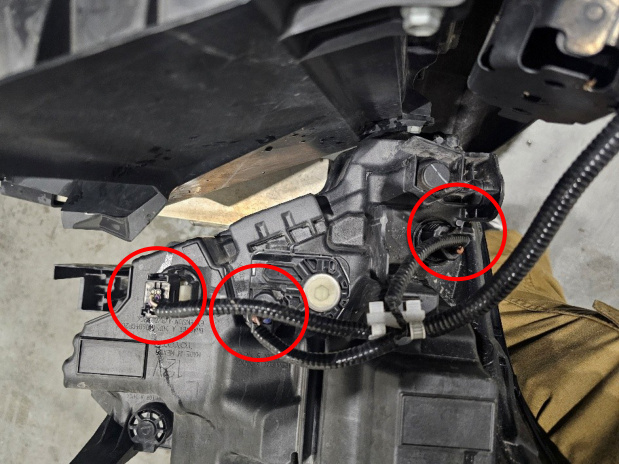
Step 13 - Remove the passenger-side headlight
Repeat Steps 11 and 12 to remove the passenger-side headlight.
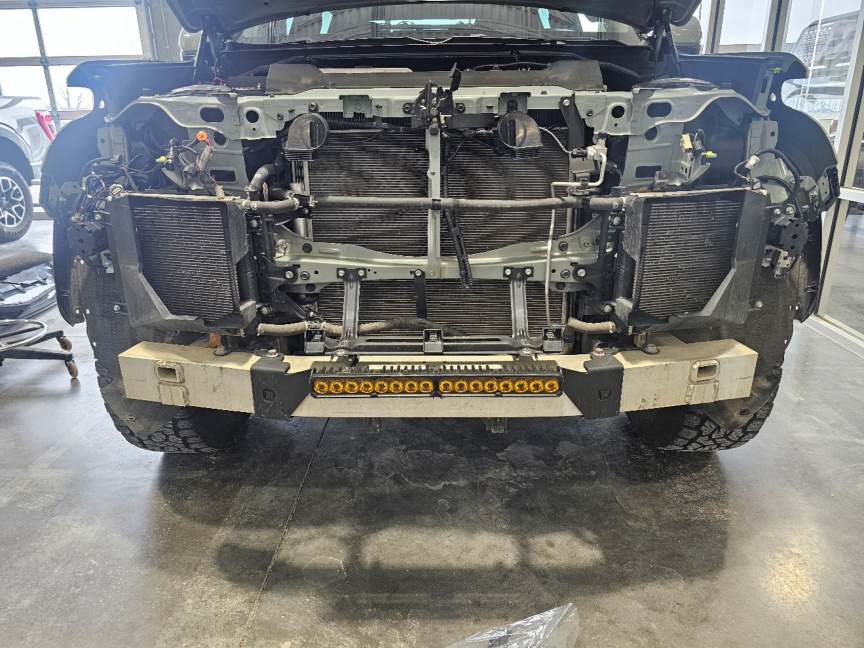
Step 14 - Install the power harness
Factory reflector headlights only: Install the supplied power harness. Vehicles with factory projector headlights can skip this step and continue to Step 15.
Non-hybrid vehicles: Use the battery in the engine bay as the power source.
Hybrid vehicles: Use the power lug in the passenger-side fuse box as the power source. Follow Steps 14A through 14G below.
Step 14A - Access the hybrid power lug
Open the passenger-side fuse box. Use a 12mm socket to remove the nut from the power lug that feeds the hybrid inverter assembly.
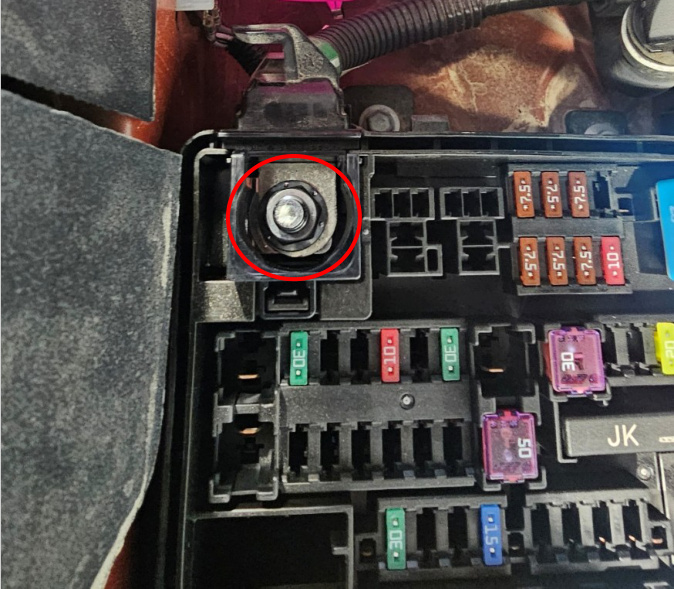
Step 14B - Release the protective housing
Depress the clip to release the cable lug and its protective housing.
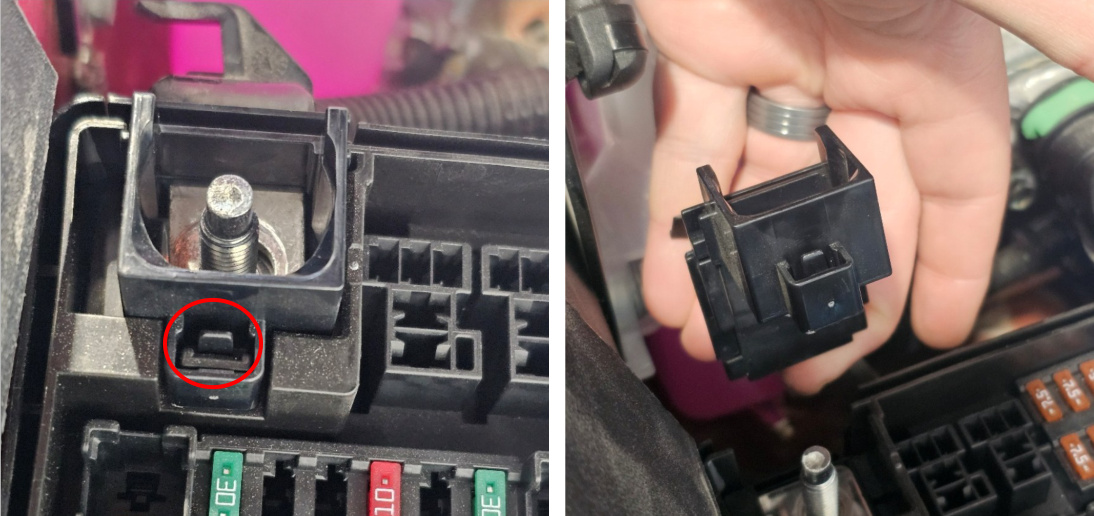
Step 14C - Separate the protective cover
Pry apart the protective cover to separate its top from its base.
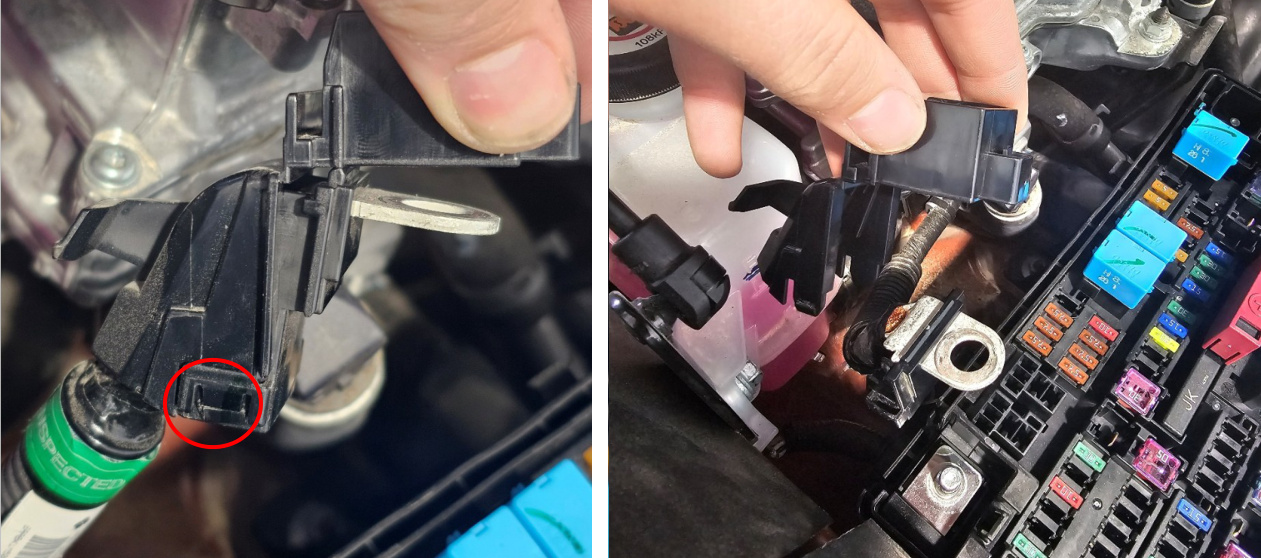
Step 14D - Remove the cover base
Remove the bottom base from the power cable.
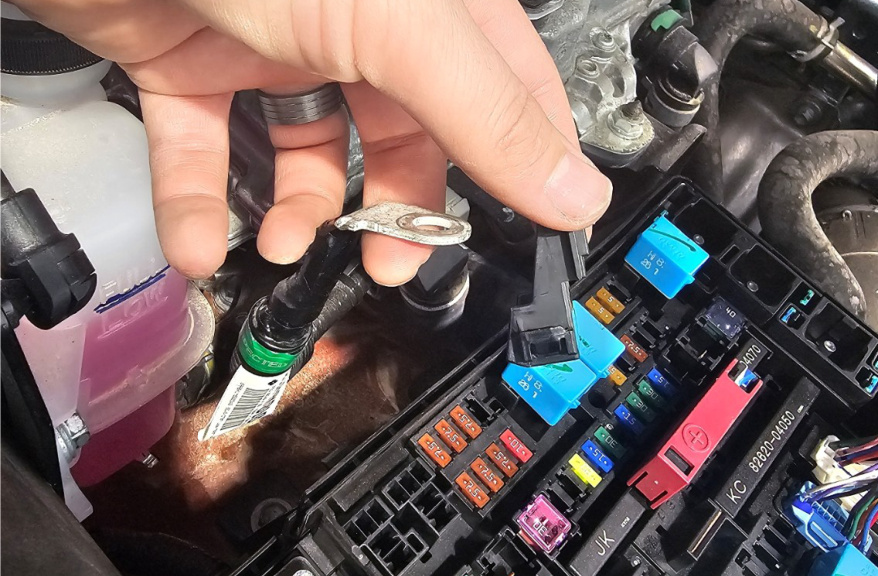
Step 14E - Connect the power harness
Reinstall the power cable on the power lug along with the power wire from the supplied power harness. Reinstall the nut.
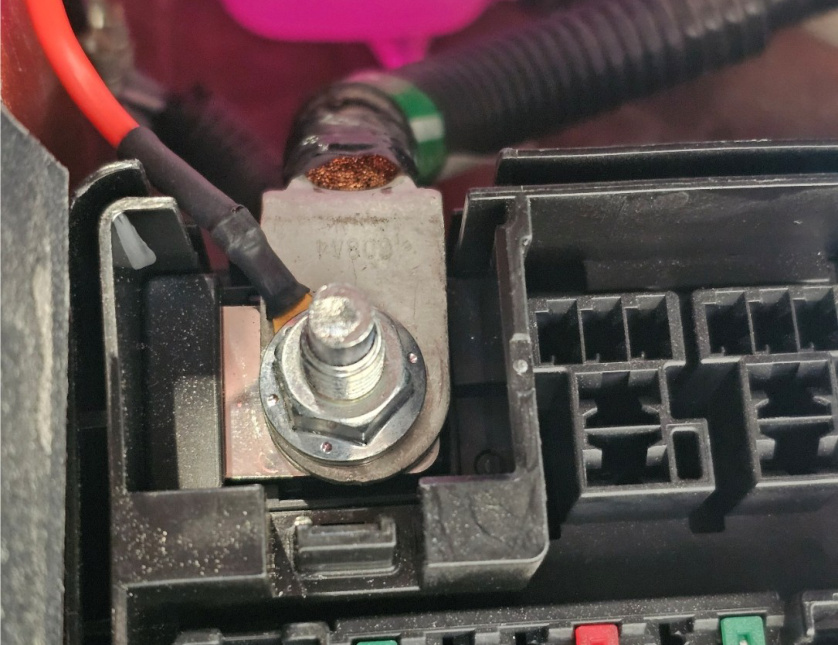
Step 14F - Reinstall the protective cover
Reinstall the top protective cover on the fuse box. Discard the bottom base piece.
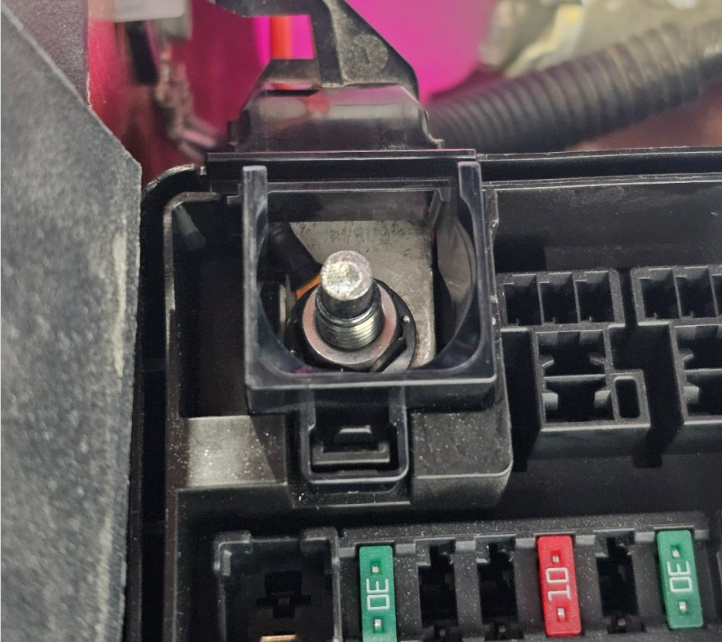
Step 14G - Connect the ground wire
Attach the power harness ground wire to the hybrid inverter itself or a chassis ground.
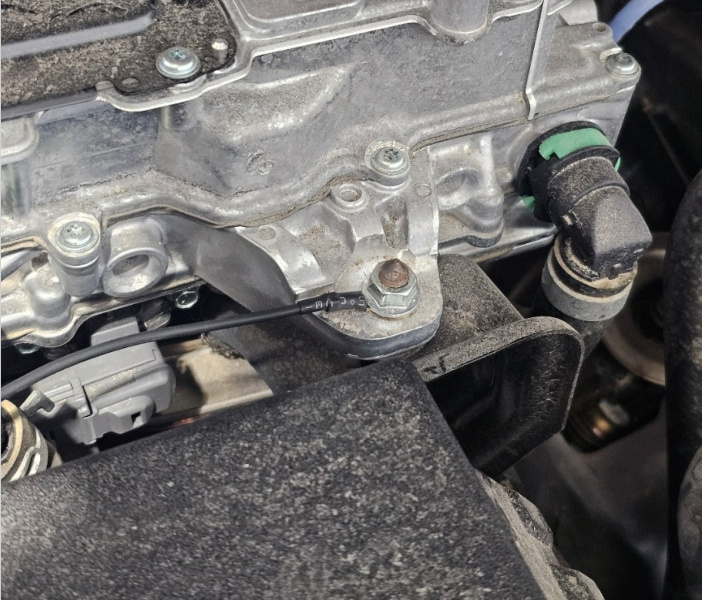
Step 15 - Connect the FORM headlights
Install the FORM headlights using the mounting locations shown in Step 11.
Factory reflector headlights: Plug the factory wiring harness directly into the headlight connectors, along with the supplied power harness.
Factory projector headlights: Connect the supplied decoder boxes inline between the factory wiring harness and the headlight connectors. If equipped, connect the leveling motor connector directly to the leveling motor on the headlight.
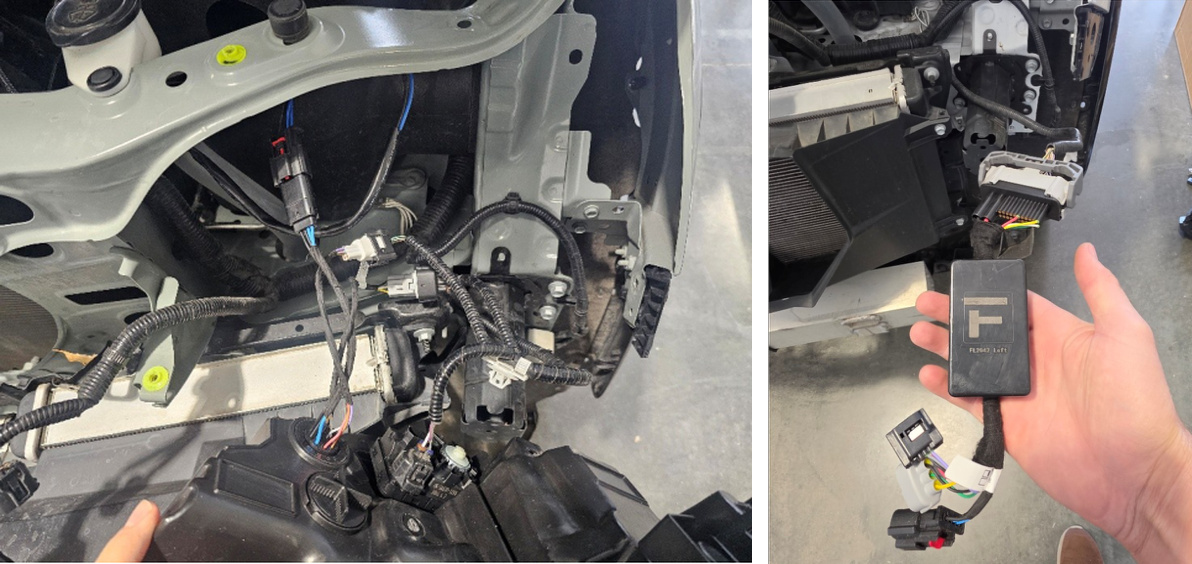
Step 16 - Test and reinstall the front end
Secure both headlights and test their operation. Reinstall the front bumper assembly and reconnect the connectors removed during disassembly.
IMPORTANT: Do not drive with the front bumper assembly disconnected. This will cause a check engine light.
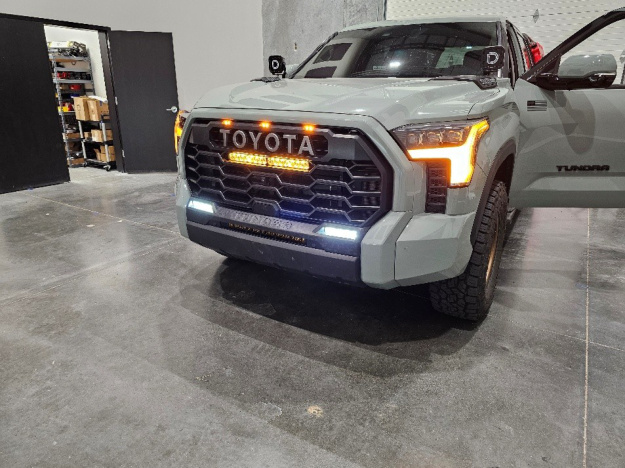
The installation is now complete. Enjoy your new LED Headlights for the 2022+ Toyota Tundra and LED Headlights for the 2023+ Toyota Sequoia!
Aiming Instructions
For vehicles with manual headlight leveling, set the adjustment to 0. For vehicles with air suspension, set the vehicle to its normal ride height.
Park the vehicle 25 feet or 10 feet from a wall, with the vehicle perpendicular to the wall. Measure from the ground to the headlight center mark and place a piece of tape on the wall at that height.
Use a long #2 Phillips screwdriver to adjust the up/down dial on the headlight. At 25 feet, the cutoff line should be 0-2 inches below the tape. At 10 feet, the cutoff line should be 0-0.80 inches below the tape.
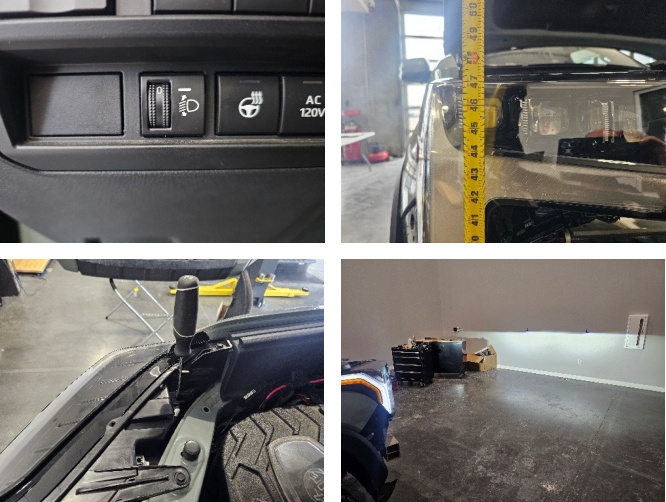
Headlight Programming
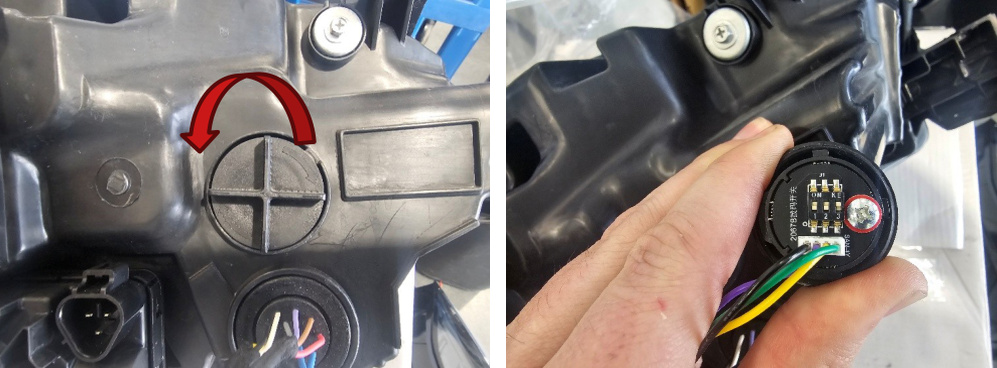
Remove the dust cap on the back of the headlight by twisting it counterclockwise. Set the jumper switches to the desired settings using the chart below.
| Switch | Default Setting | Alternate Setting |
|---|---|---|
| 1 | Welcome animation | Welcome animation off |
| 2 | Sequential turn signal | Static turn signal |
| 3 | White DRL | Amber DRL |
Questions About the Installation?
If you have any questions about installing the LED Headlights for the 2022+ Toyota Tundra and LED Headlights for the 2023+ Toyota Sequoia, contact us via our support page.
Where Can I Buy the LED Headlights for the 2022+ Toyota Tundra & 2023+ Toyota Sequoia?
If you're ready to upgrade your vehicle, shop the LED Headlights for the 2022+ Toyota Tundra and LED Headlights for the 2023+ Toyota Sequoia at FORMLights.com or use our Dealer Locator to find a dealer near you.
Want to know more about FORM Lighting products? Visit FORMLights.com for new product releases and more!
This Installation Guide is for the following SKUs: FL0101, FL0111